In this menu, you can register and manage Course.
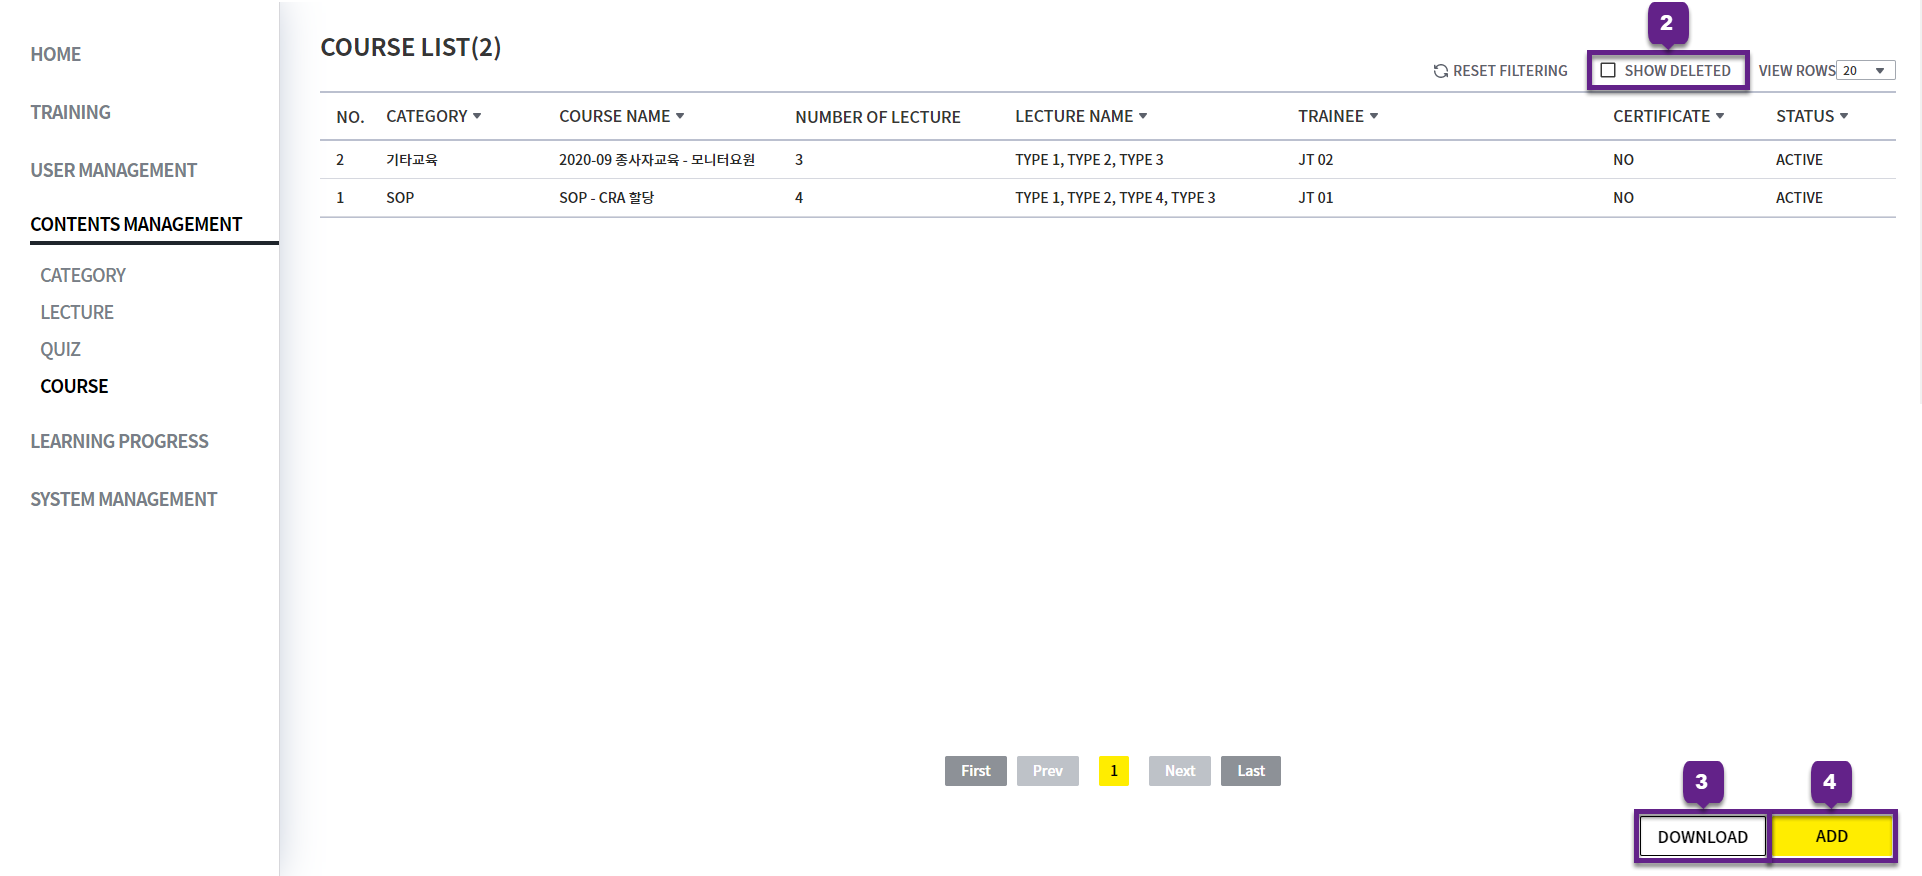
COURSE LIST
1. Click each row to go to the Course detail page.
2. Show Deleted: If checked, you can view deleted Course.
3. Dowload button: Click to download the current Course list as an Excel document.
4. Add button: You can create a new Course.
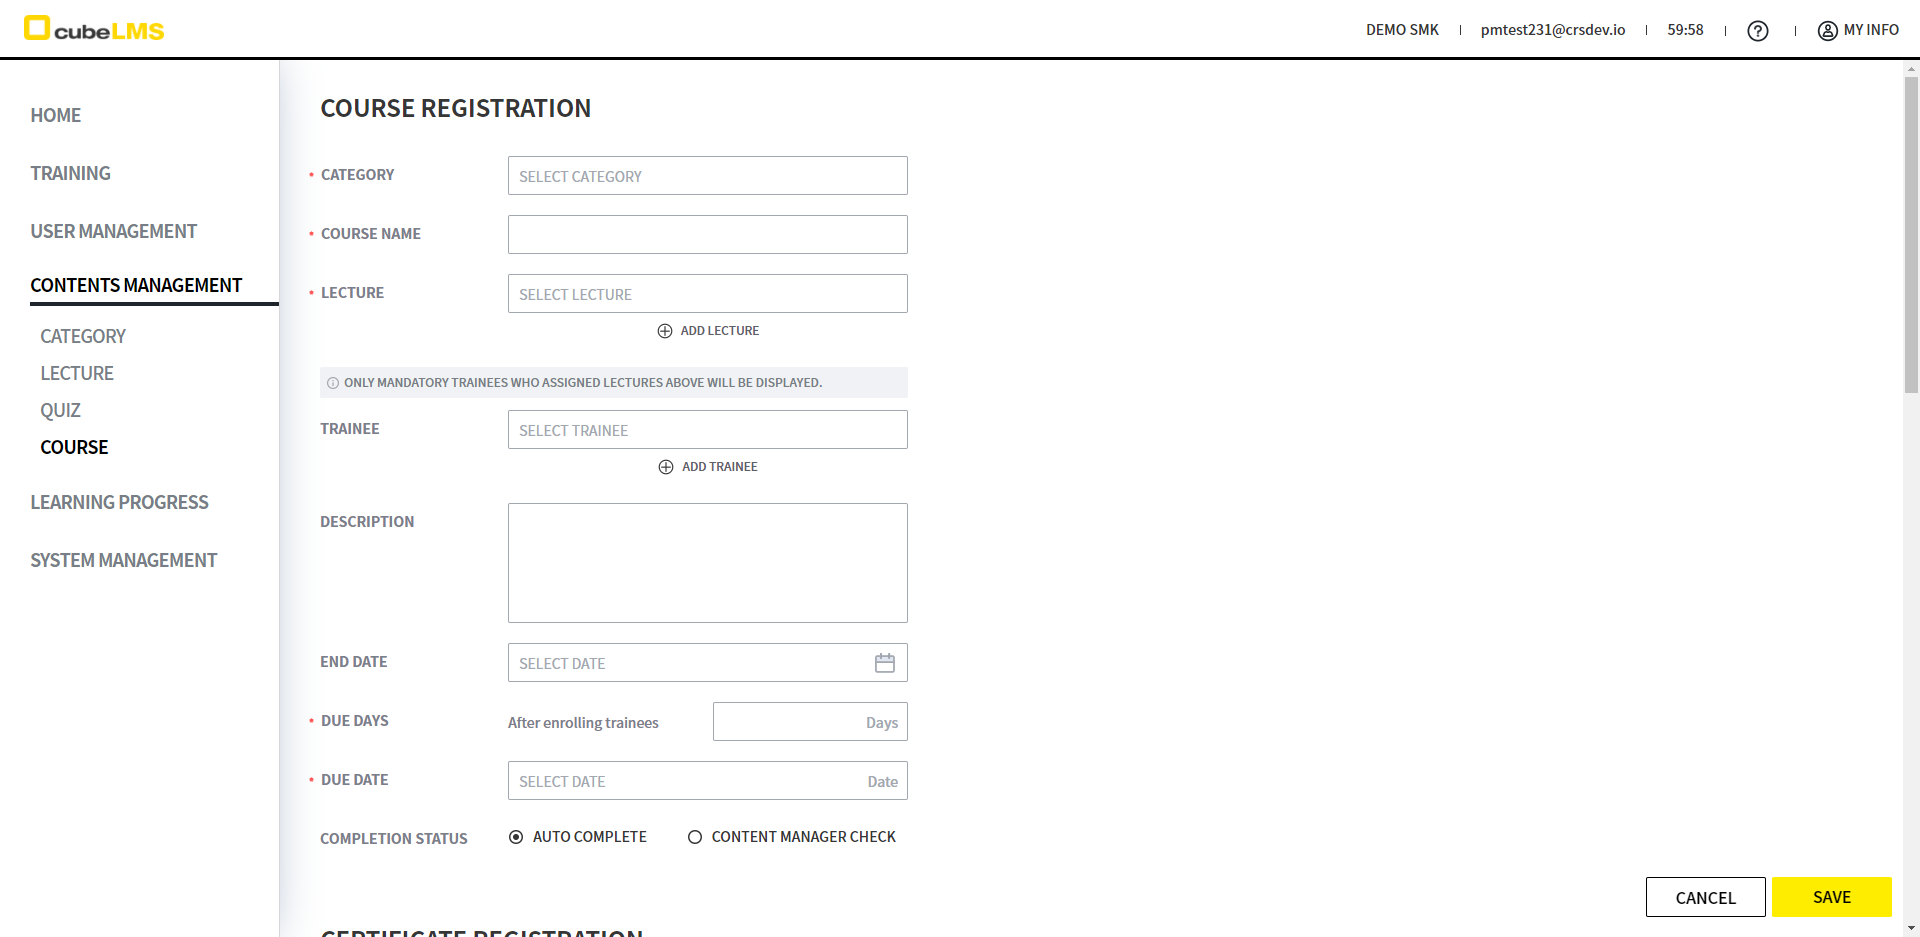
ADD COURSE
1. Click the Add button to create a Course.
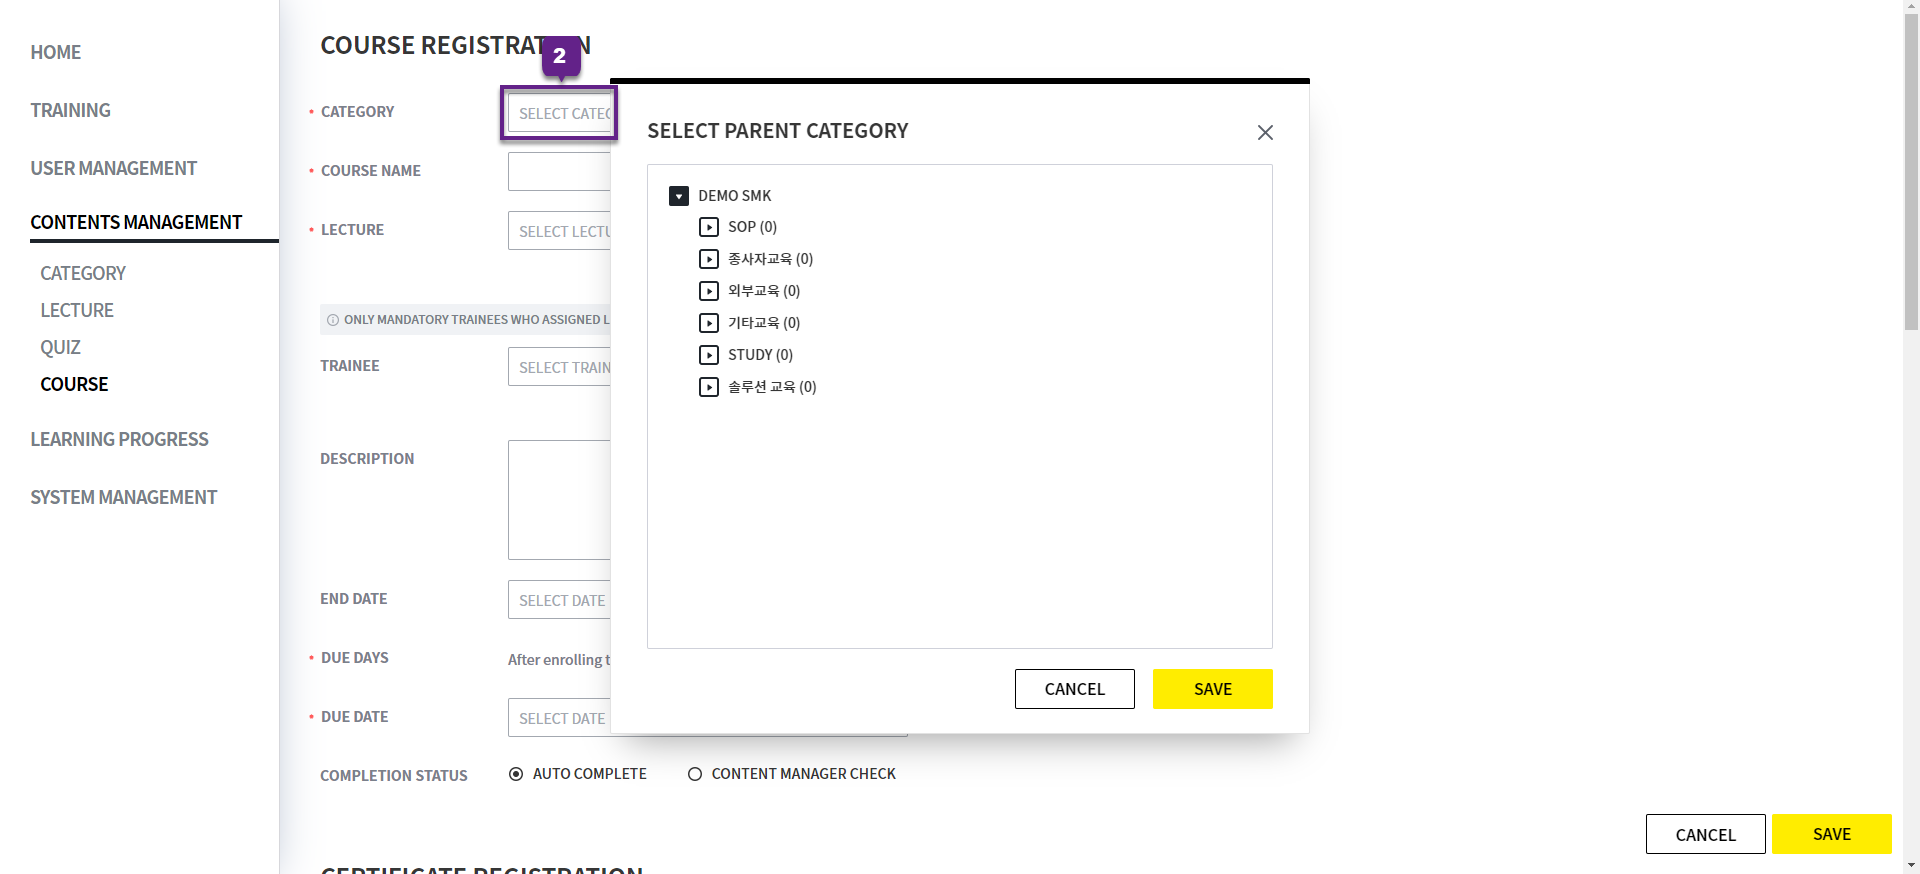
2. Category: Click it to display the category hierarchy. Select the category that the Course will belong to.
After Course registration, only the selected Category and its subcategories can be selected.
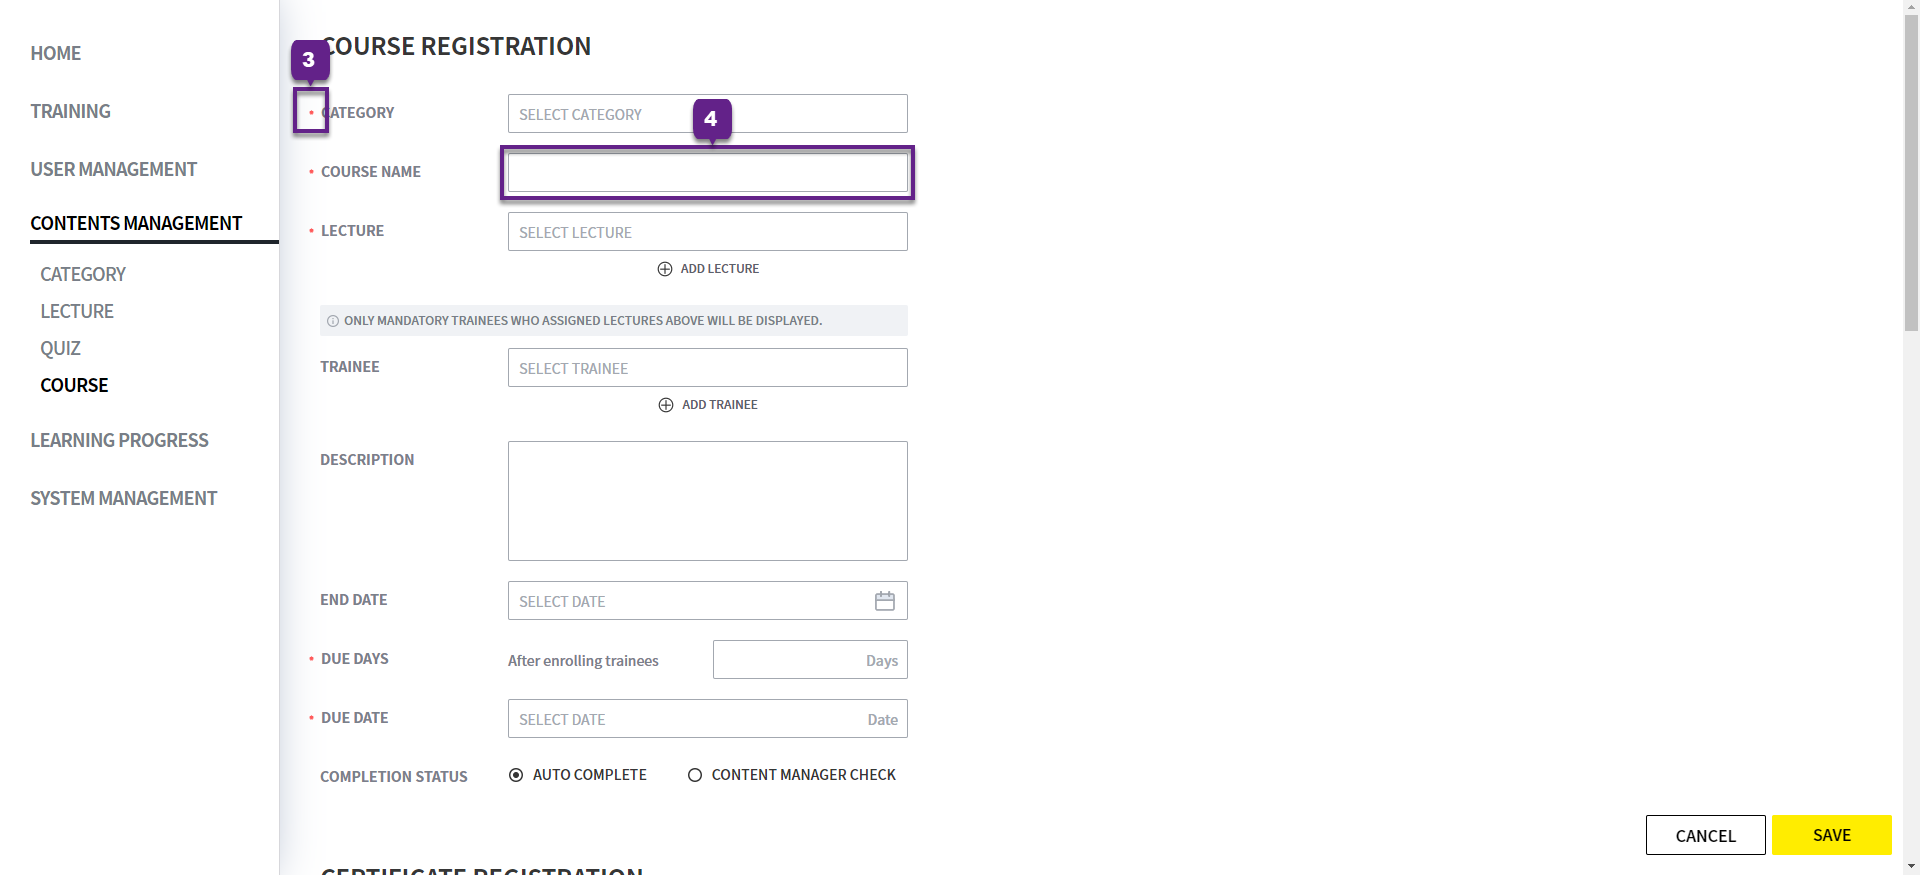
3. '*' indicates a required field.
4. Cousre Name: Enter the name of the Course to create. Within the same category, you cannot enter a duplicate name, including deleted Course.
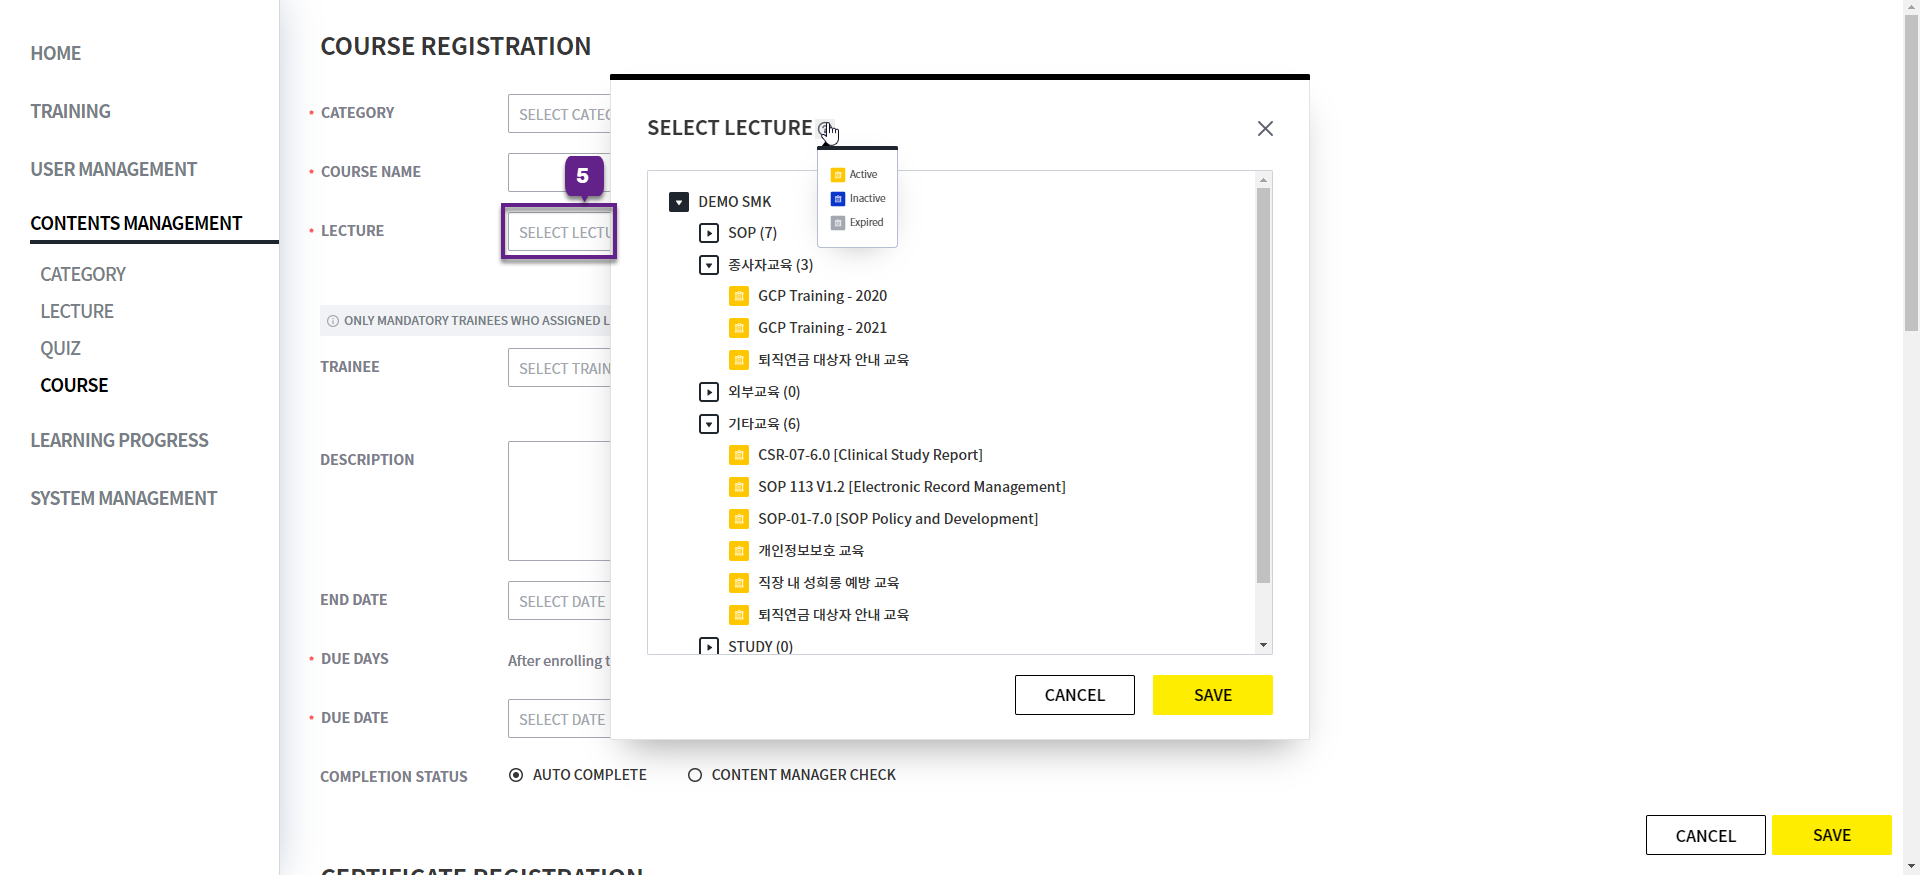
5. Lecture: Select the Lecture to include in the Course. In the popup that appears when you click the field, you can view the Lectures in each category.
Invalid, Deleted Lecture is not displayed.
It is displayed in different colors according to the status of Lecture.
-
Active:is displayed in yellow and can be selected. -
Inactive:is displayed in blue and can be selected. -
Expired:is displayed in gray and cannot be selected.
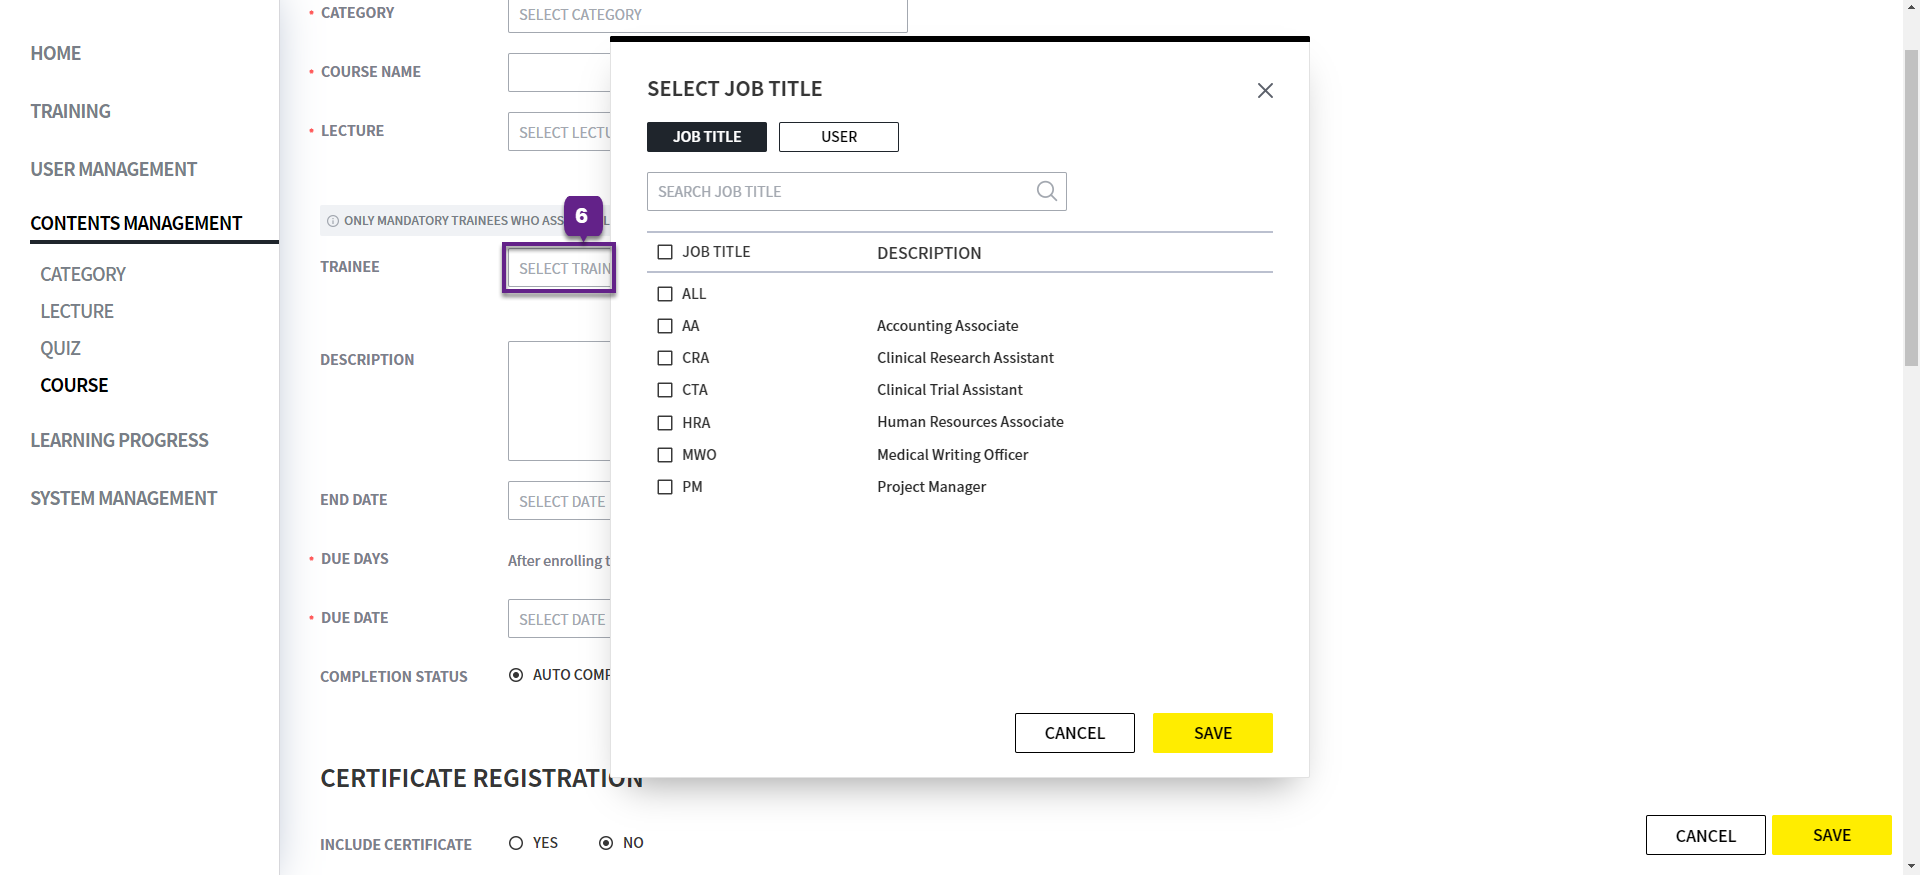
6. Trainee: Designate the Trainee to be assigned to the Course. You can assign by Job Title or User, and duplicate assignments are also allowed.
-
Job Title:Assigned to Trainee with the selected Job Title. -
User:Only User in Active status is displayed, and the selected User is assigned.
-
Only the common Job Title and User Name are displayed in the Mandatory tab of the Lecture selected in the Lecture field.
-
For example, if JT 1+JT 2 and JT 1 are assigned in the Mandatory tabs of Lecture 1 and Lecture 2, respectively, only JT 1, the common item between the two Lecture items, is displayed in the list.
-
This intersection condition is shown only when common items are identified separately for All, User Name, Job Title in each unit.
-
For example, assume User 1 and User 2 belong to Job Title K, and the User assignments for Lecture A and B are as follows.
-
Lecture A: User 1 and User 2 are assigned as Mandatory
-
Lecture B: Job Title K is assigned as Mandatory
In this case, the User assigned to the Lecture is the same, but when you select Lecture A and Lecture B on the Course add/edit screen and then select the Trainee field, nothing is displayed.
-
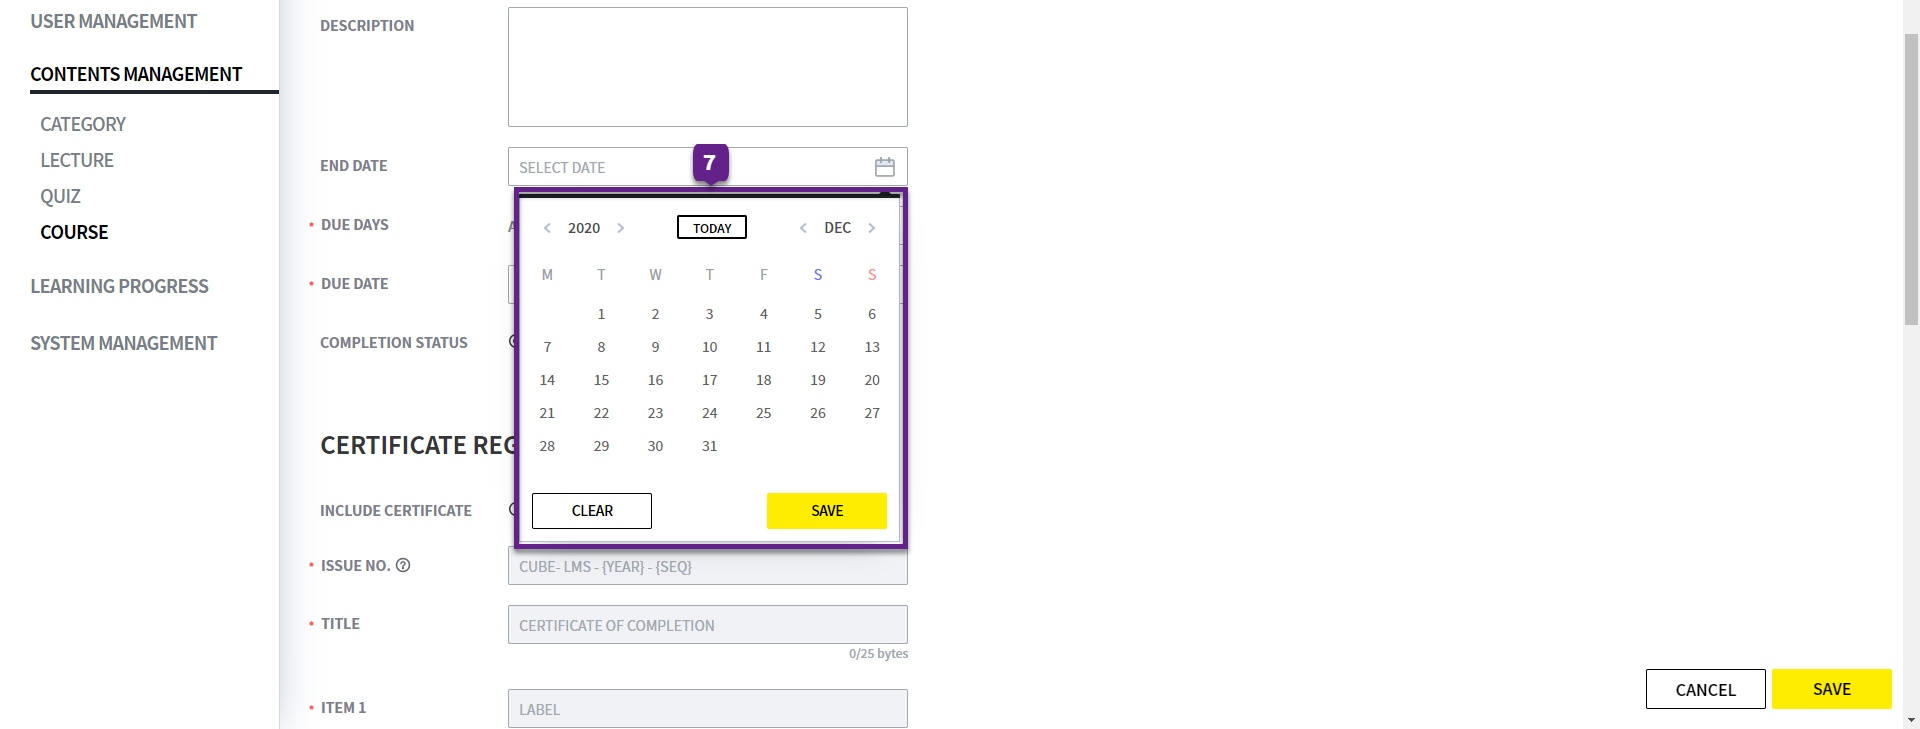
7. End Date: This item sets the Course expiration date. Please note the following:
-
You cannot select a past date based on today.
-
Once the entered date has passed, the Course is no longer assigned to Trainee.
-
You cannot set a date later than the expiration date of the selected Lectures.
(This is to prevent situations where lower-level Lectures have expired and actual learning is impossible.) -
Unlike Lecture, no Start Date is set, and Course is assigned to Trainee immediately upon creation.
Detailed descriptions of Course statuses are as follows.
-
Active:If Course creation date ≤ Today ≤ End Date, it is assigned to Trainee. -
Expired:If End Date < Today, it is no longer assigned to Trainee.
8, 9. Please refer to the page below for these items.
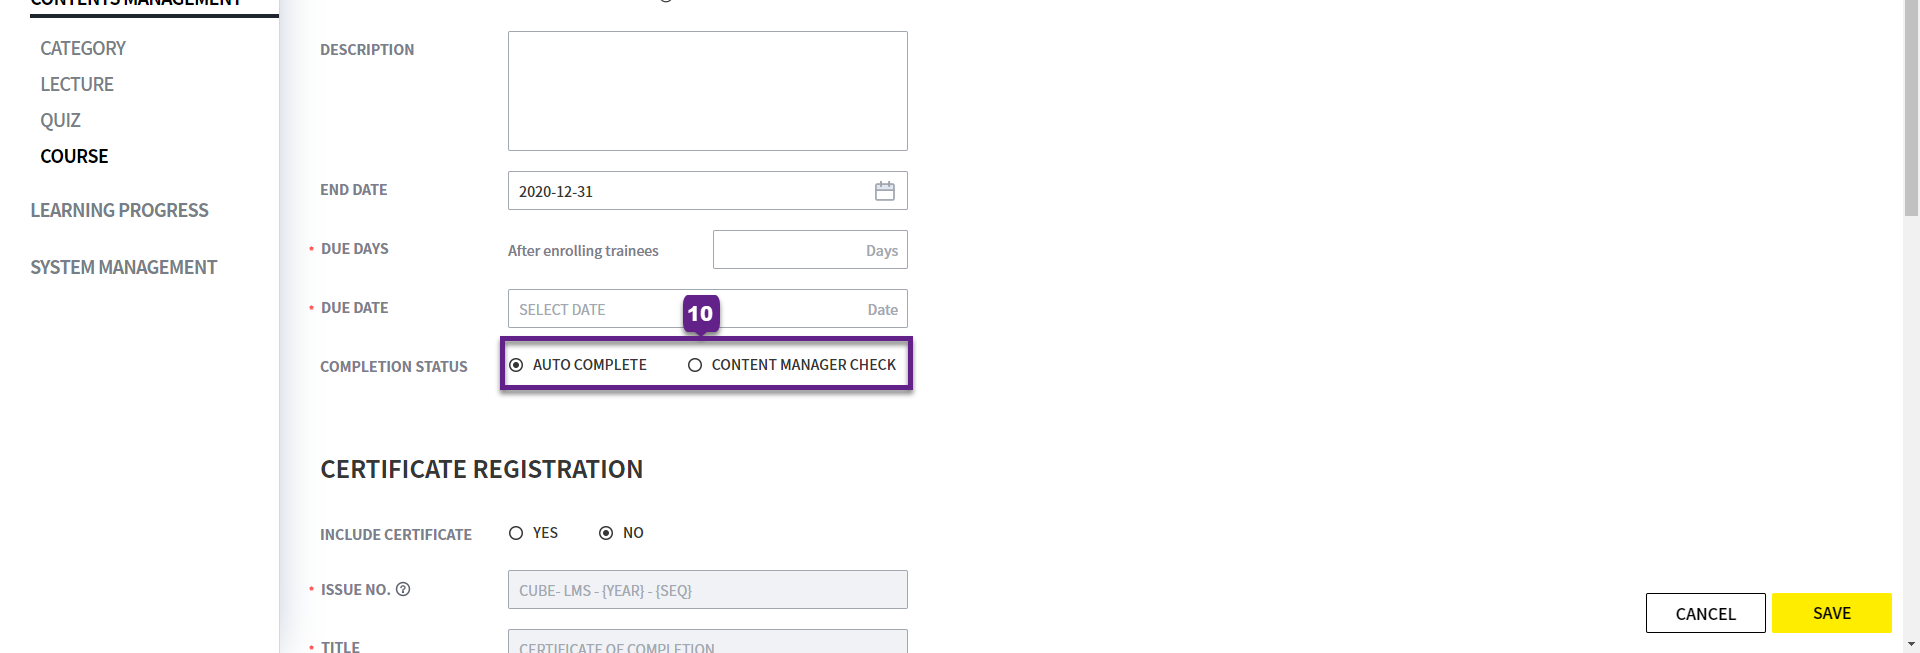
9. Due Date: Past dates cannot be entered as of today.
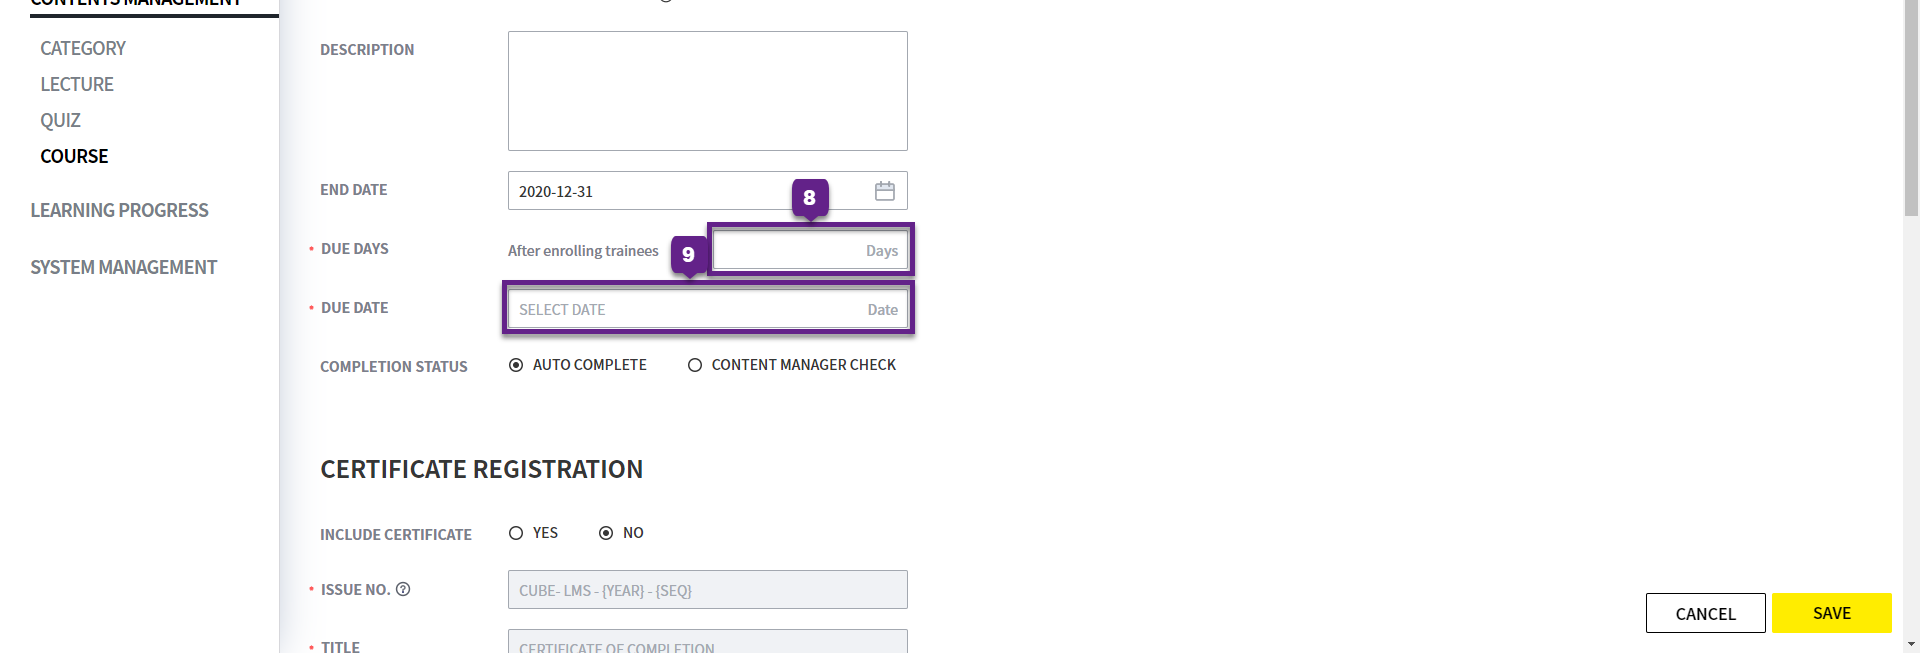
10. Completion Status: When all Lectures included in the Course are completed, you can choose whether to complete it automatically or to complete it manually after confirmation by Contents Manager. The available options are as follows:
-
Auto Complete:When all Lectures included in the Course are completed, it is automatically marked as completed. -
Content Manager Check:Even if all Lectures have been completed, it is not automatically marked as completed, and the Contents Manager must review it directly and mark it as completed manually.
ADD COURSE- CERTIFICATE REGISTRATION
1. Include Certificate: You can select whether to include a Certificate.
Once even one User has been issued a Certificate, you cannot change the Course's "Include Certificate" setting to "No". Therefore, please decide carefully whether to include a Certificate.
2. Issue No.: You can directly set the Certificate “Issue No.” included in the Course, and duplicate values cannot be entered, including deleted Course.
You can set automatic generation rules using macros. The following macros are available:
-
{SEQ}:Indicates the Certificate issuance sequence number. It is automatically assigned in the format 01, 02, 03... based on the Trainee who completed the Course. Required item. -
{YEAR}:The year the Certificate was issued is displayed.
※ If the year changes, the SEQ for that year restarts from 01. -
Example) If Issue No is set as shown in parentheses
(CUBE-LMS-{YEAR}-{SEQ})-
The first Trainee to complete the Course in 2020 →
CUBE-LMS-2020-01 -
The second Trainee to complete the Course in 2020 →
CUBE-LMS-2020-02 -
The first Trainee to complete the Course in 2021 →
CUBE-LMS-2021-01
-
-
If even one User has received a Certificate, the Issue No. for that Course cannot be modified. Therefore, please set it carefully when registering it for the first time.
-
{SEQ}:It must be included, and if omitted, the Certificate may not be issued properly.
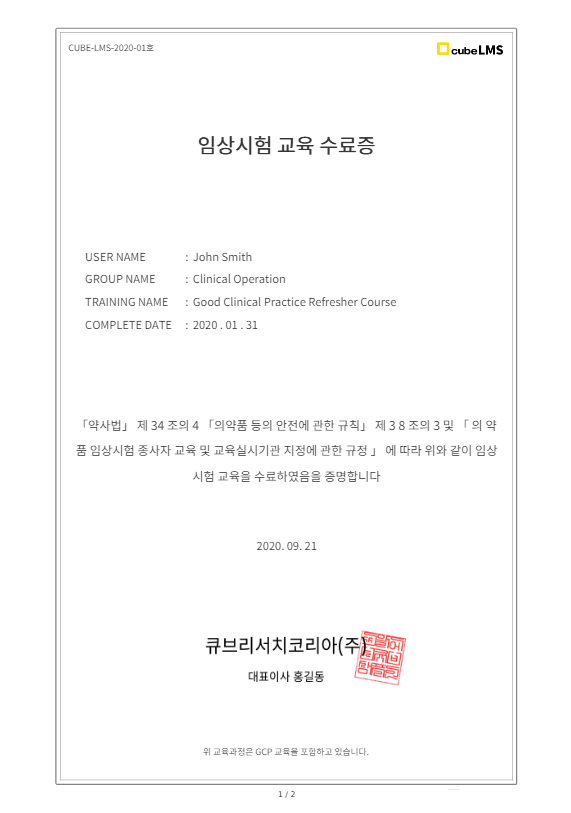
3. Title: You can directly enter the Title to be displayed at the top center of the Certificate.
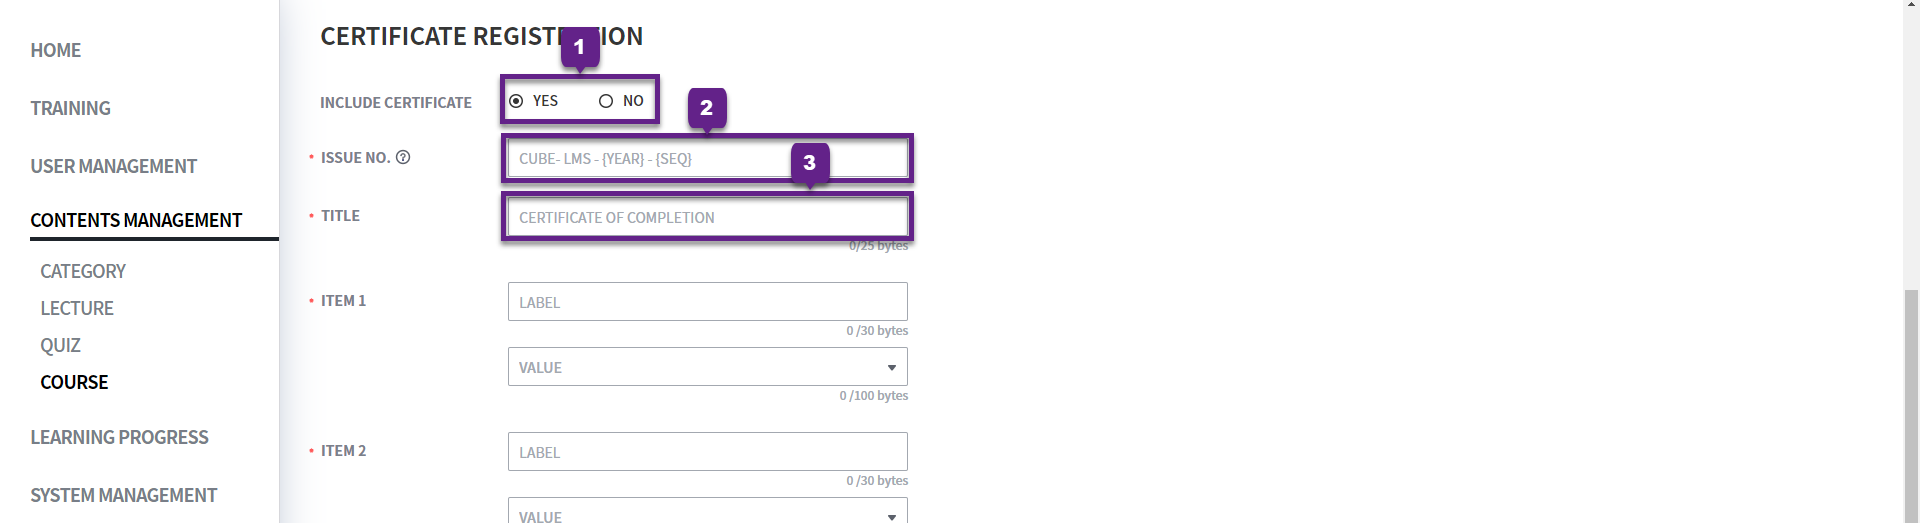
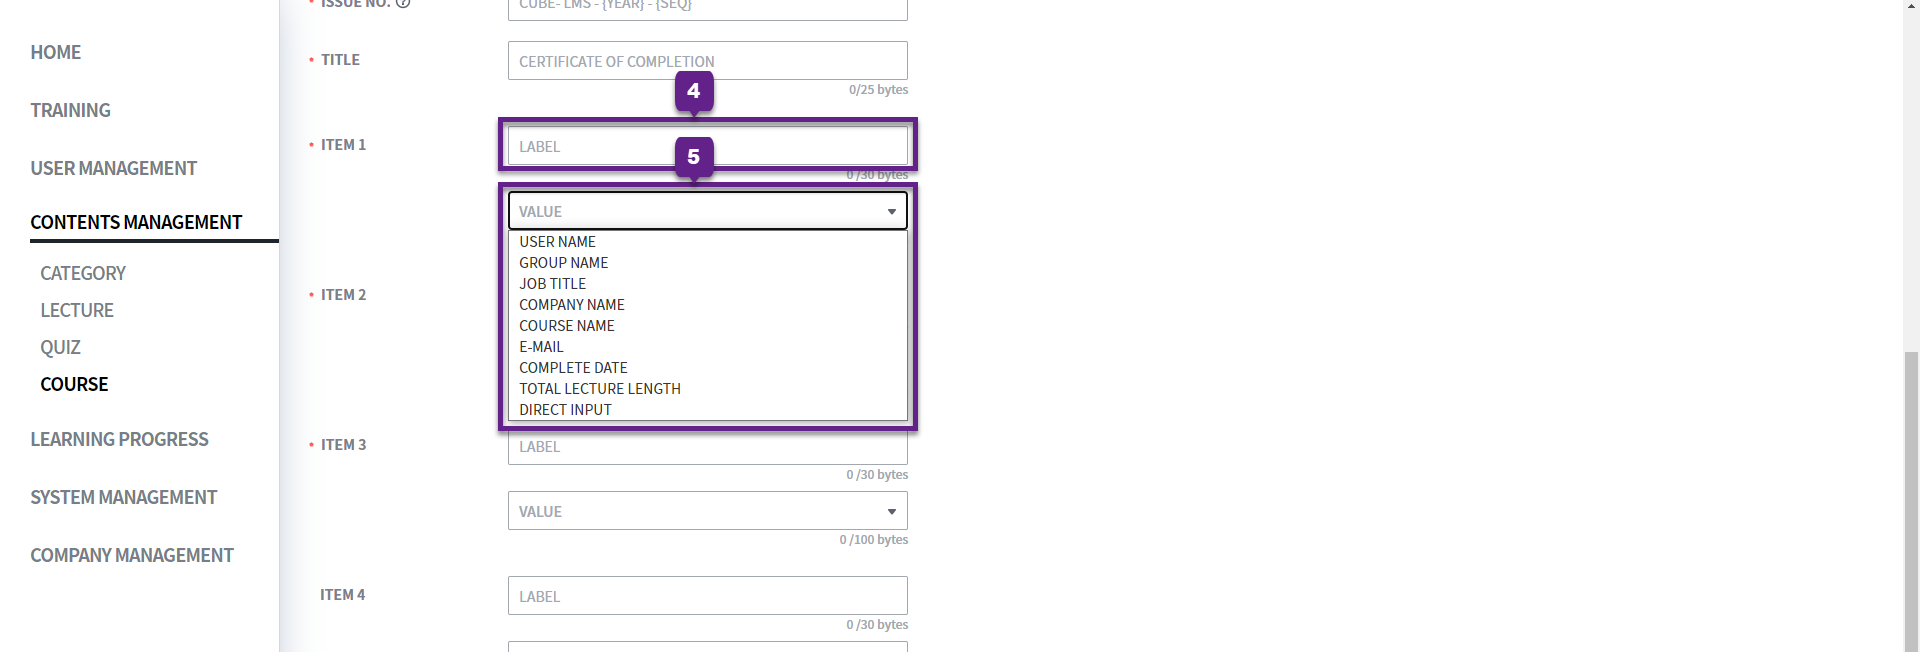
4. Item: You can enter a minimum of 3 items and a maximum of 4 items in the Certificate.
-
Label:This is a label that indicates the name or description of the item.
For example: name, completion date, course name, etc.
→ You can enter any text freely, and it will be displayed as-is on the Certificate.
5. Value: The value actually displayed, and information entered automatically by the system or entered manually is displayed.
e.g., Hong Gil-dong, May 20, 2025, Basic Clinical Training Course, etc.
-
If you select Value first while Label is empty, the appropriate Label is automatically entered.
-
The available items are as follows:
|
|
|
|---|---|
|
|
User name is displayed. |
|
|
The name of the group that the User belongs to is displayed. If there are two or more groups, only the first group name in ascending order by group name is displayed. |
|
|
Job Title is displayed. If there are two or more Job Titles, only the first one in ascending order by Job Title name is displayed. |
|
|
The company name is displayed. |
|
|
The Course Name used as the basis for issuing the Certificate is displayed. |
|
|
The User's E-Mail address is displayed. |
|
|
The date on which the User completed the Course is displayed. |
|
|
The total learning time of the Lecture included in the Course is displayed in minutes. |
|
|
In addition to predefined values, you can enter the desired text directly. If you select this item, an input field will be added below. |
6. Contents: You can freely enter the content to be included in the Certificate body.
7. Issue Date: You can select the display format for the issue date shown on the Certificate. The default is YYYY.MM.DD format, and you can choose from the options below:
|
# |
|
|
|
|---|---|---|---|
|
1 |
|
|
Displays the issue date in year-month-day format. |
|
2 |
|
|
Displays the year, month, and day using periods (.). |
|
3 |
|
|
Displays the year, month, and day in Korean format. |
|
4 |
|
|
Uses the full English month name. |
|
5 |
|
|
Uses the abbreviated English month name in a shorter format. |
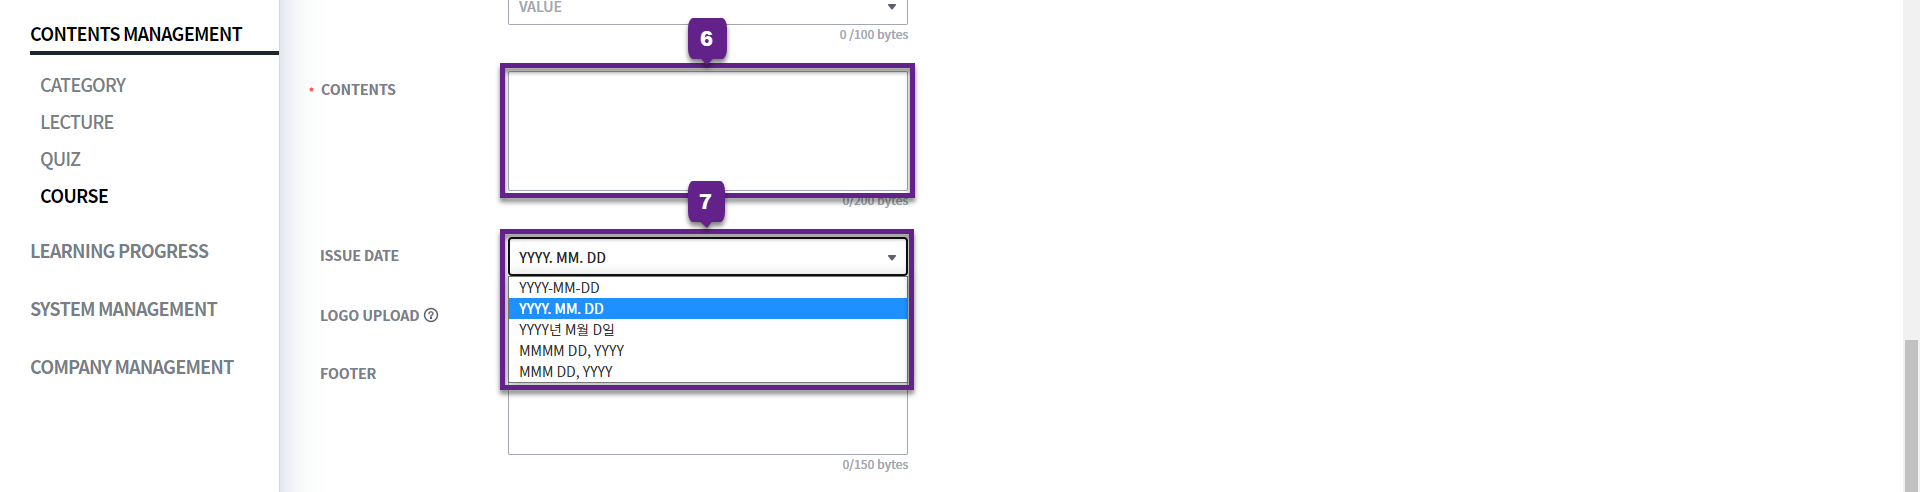
8. Logo Upload: You can upload the image (logo) to be displayed at the bottom of the Certificate.
-
Image area:
731px * 250px -
Supported file formats:
png, jpg, jpeg
If the uploaded image does not fit the specified area, its width is automatically adjusted based on the height and displayed.

9. Footer: You can enter the text to be displayed at the bottom (footer) of the Certificate.
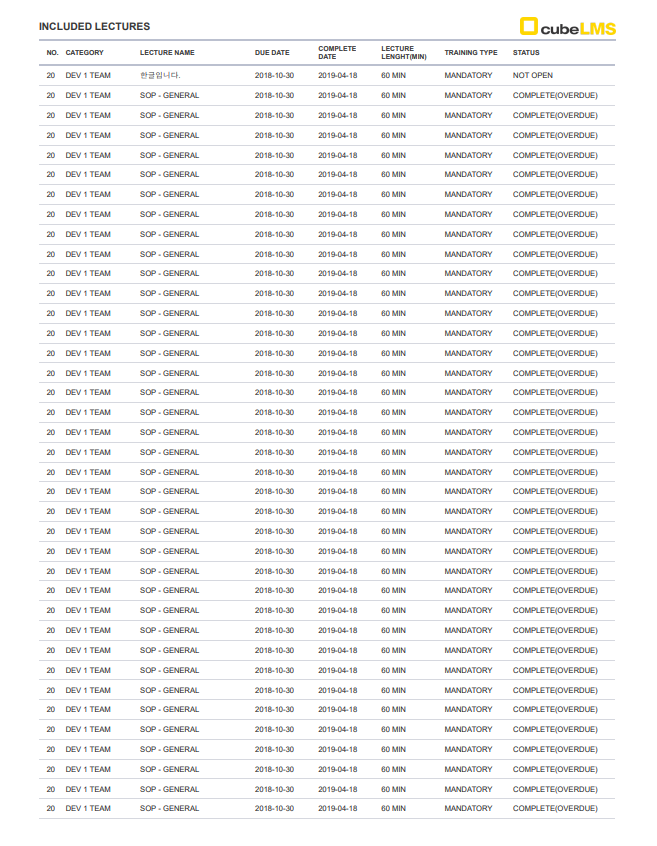
10. Included Lecture List: If checked, the Lecture list used as the completion criteria is displayed.
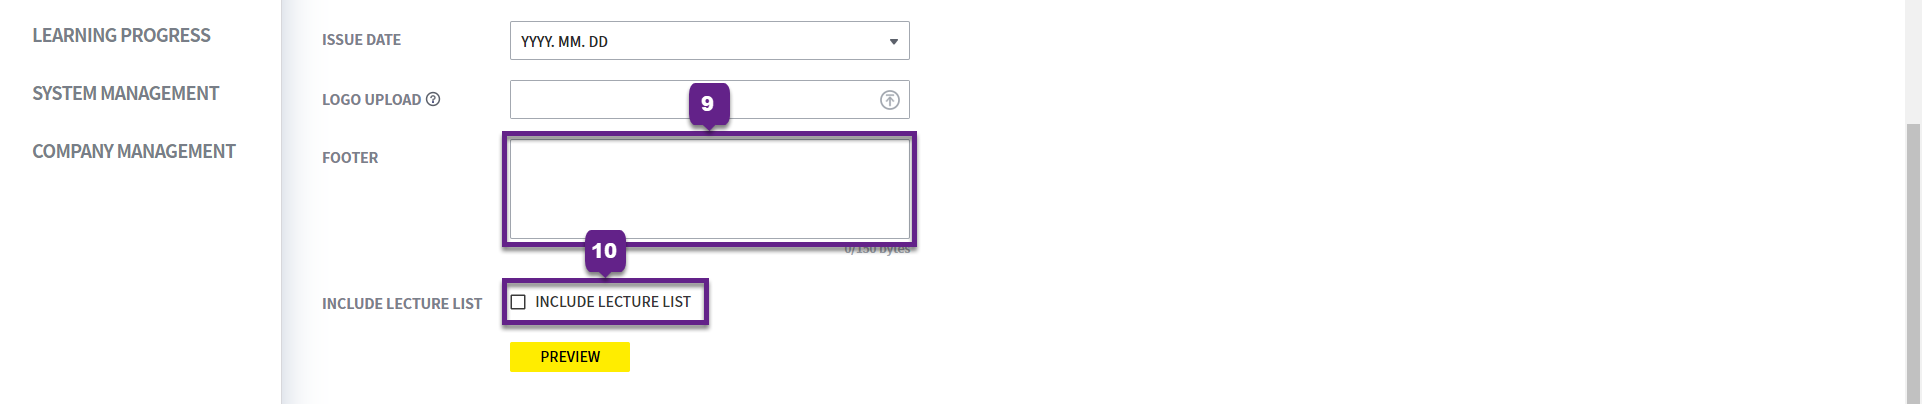
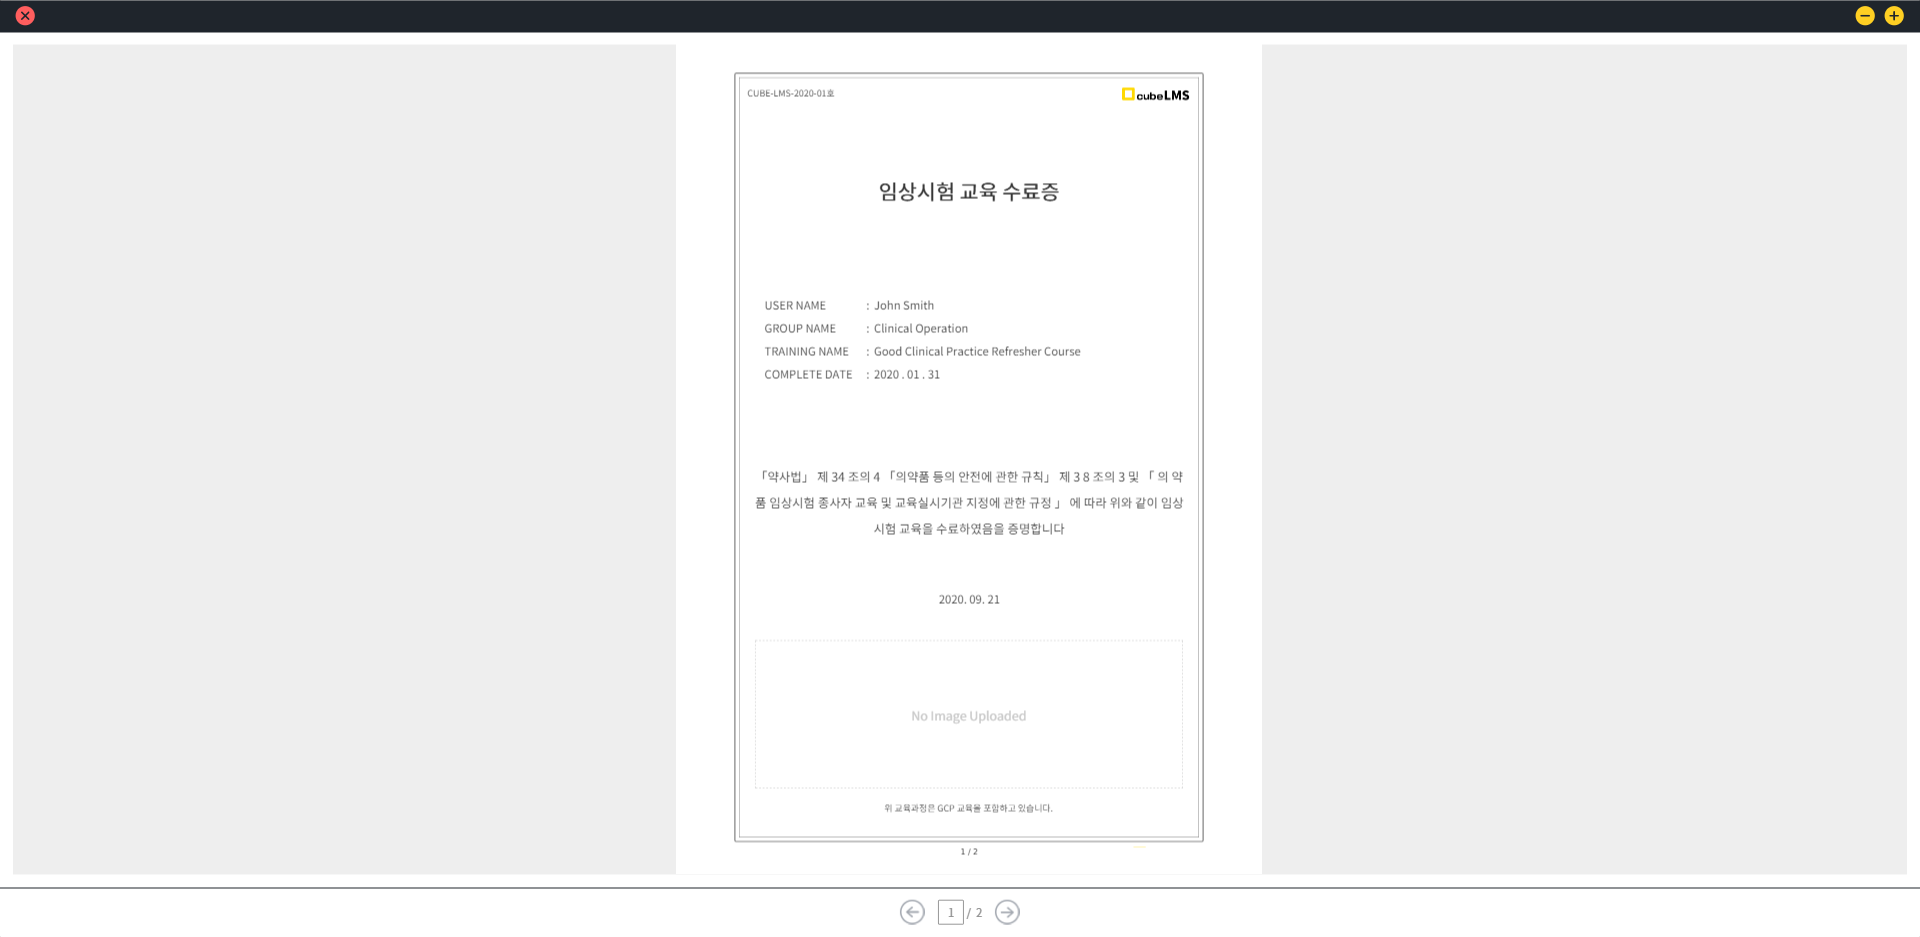
11. Preview: After completing the settings, click the Preview button to view the final Certificate with the entered content applied on the screen in advance.
This allows you to review and edit the layout, text, and item information before issuing it.
12. Include Lectures: If the Included Lecture List item is checked, the list of Lectures included in the Course is automatically added to the second page of the Certificate.
ALARM MAIL-COURSE ASSIGNMENT
-
When you register a Course, an automatic notification email is sent to the Trainee assigned to that Course.
-
If you click the Course name, you are taken to the Course learning screen.
