In this menu, you can register and manage USERs who will use this system.
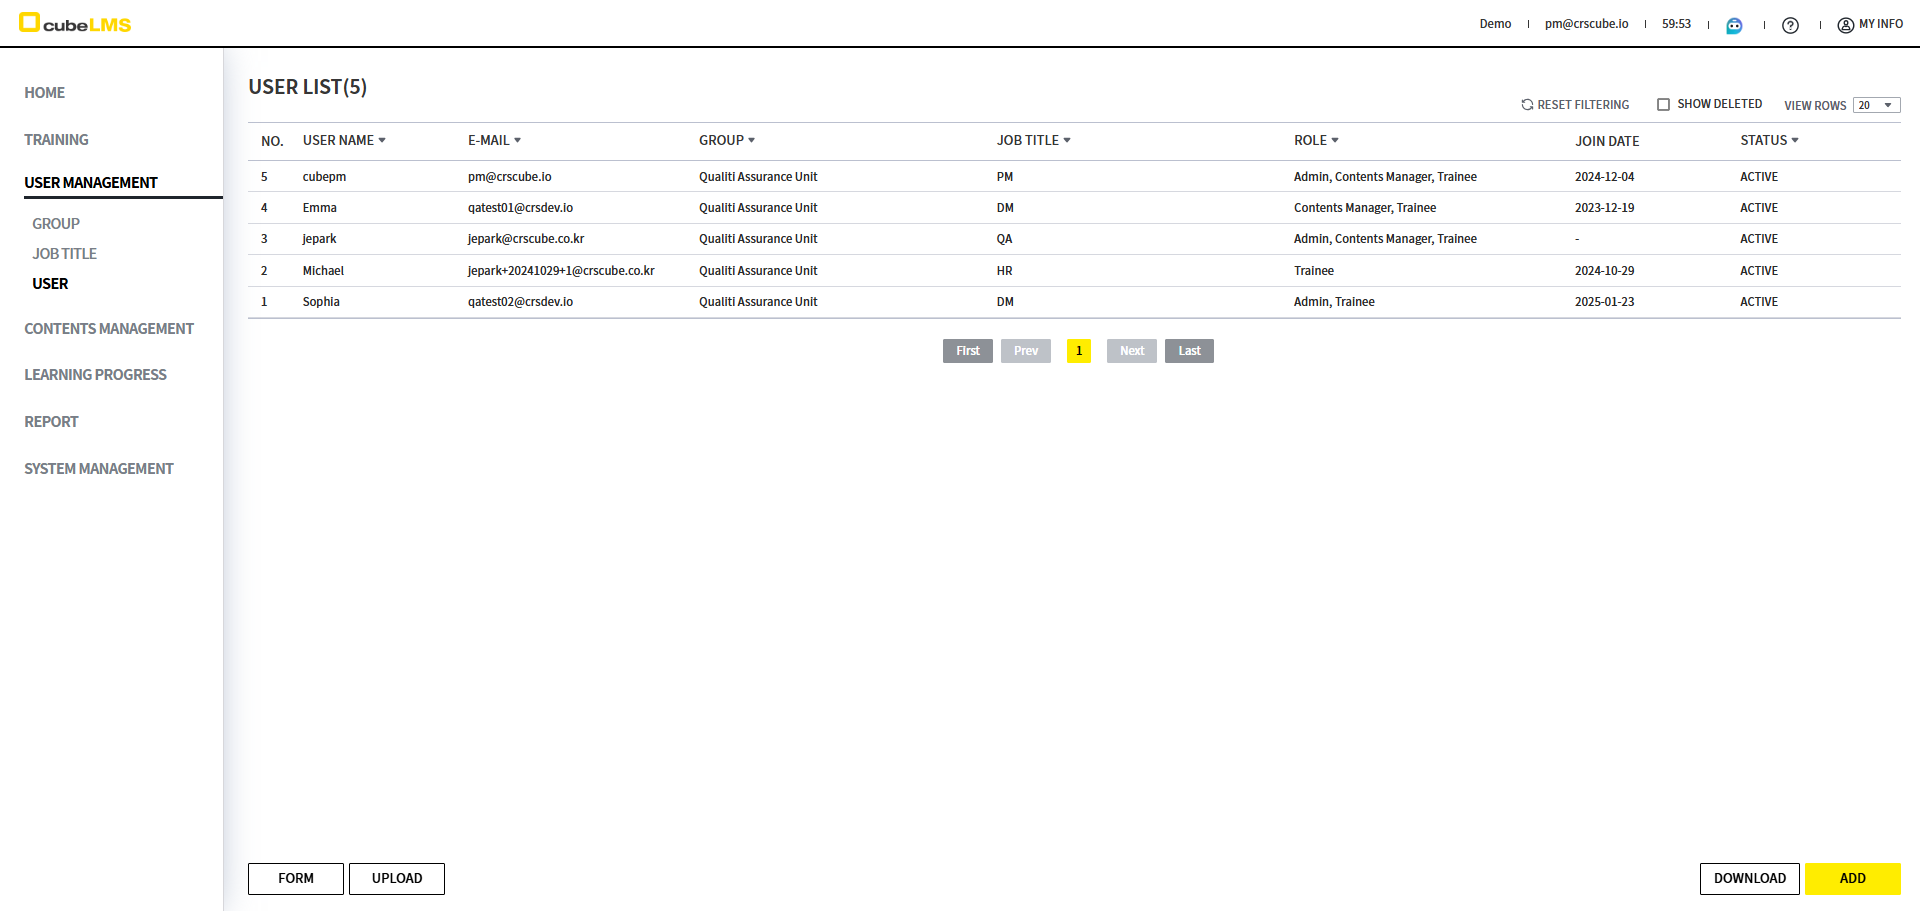
USER LIST
|
|
|
|---|---|
|
|
User's User Name is displayed. |
|
|
User's E-mail is displayed. |
|
|
The Group the User belongs to is displayed. |
|
|
The Job Title assigned to the User is displayed. |
|
|
User's Role is displayed.
|
|
|
The date the User joined the Company is displayed. |
|
|
User's Status is displayed.
|
-
Click a User row to view the details for that User.
-
Show DeletedCheck: You can view deleted User information. -
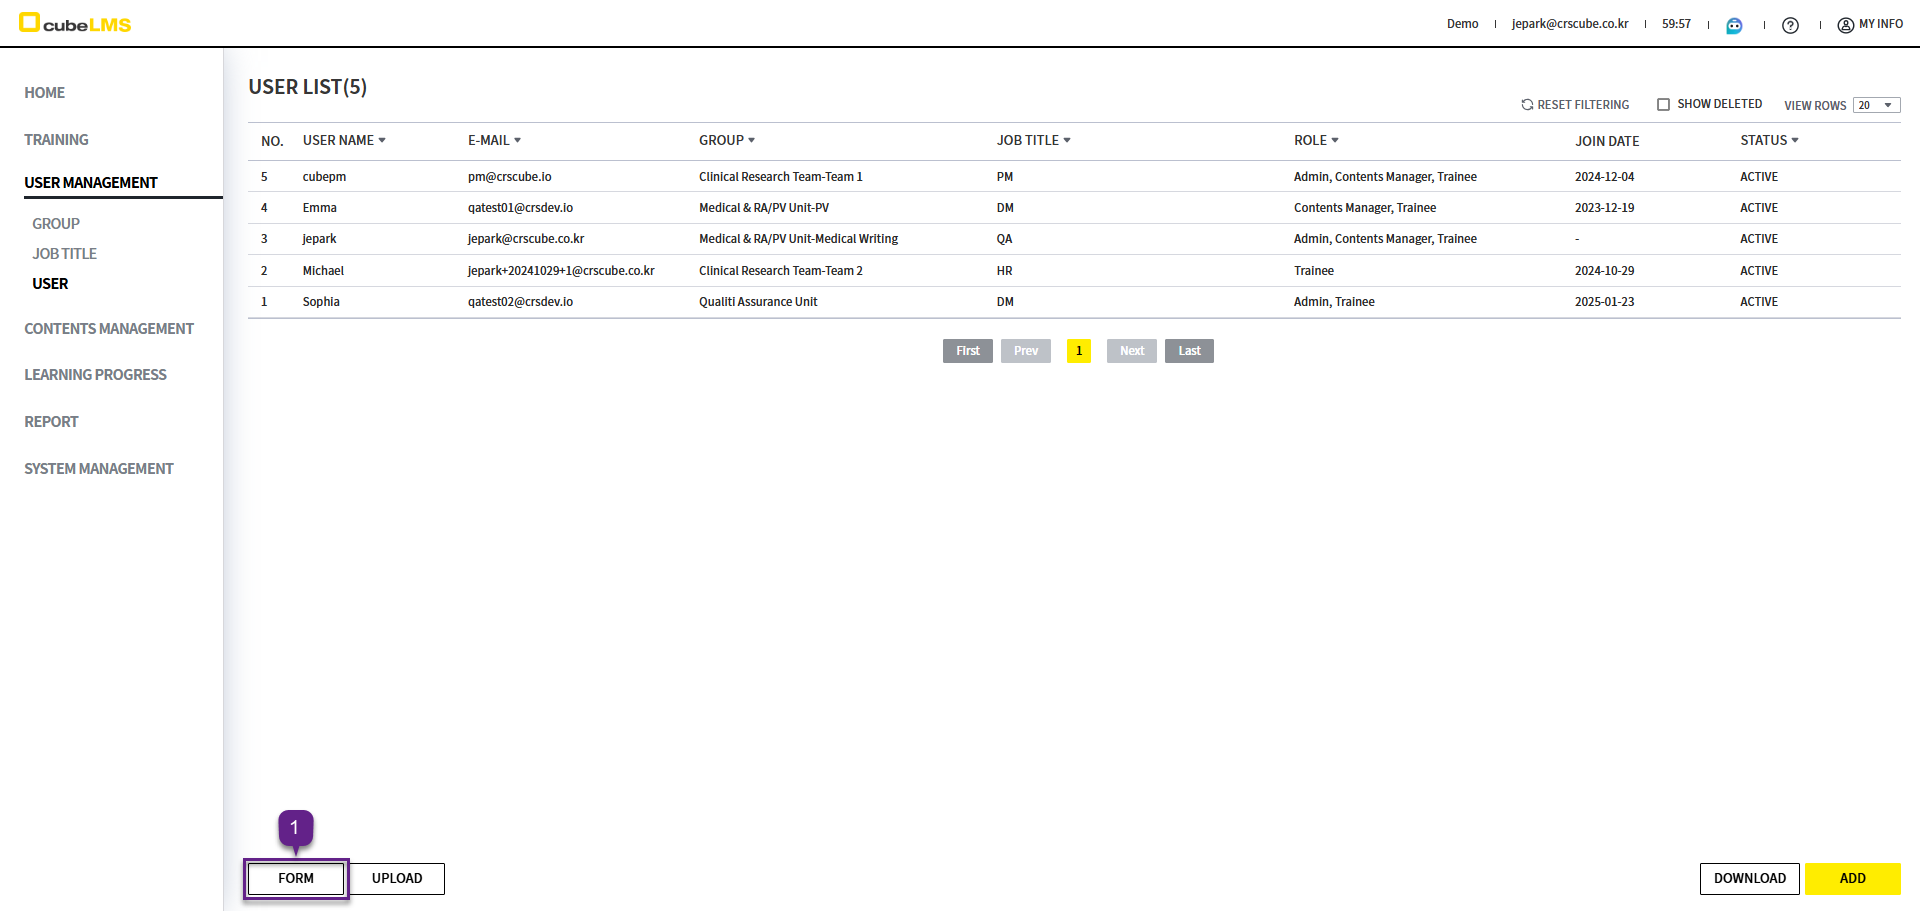
AddButton: You can register a new User. -
DownloadButton: You can download the currently filtered User List as an Excel file. -
FormButton: You can download the Excel Form to upload multiple User entries at once. -
UploadButton: You can register a User by uploading an Excel Form.

-
CREATE ACCOUNT In some CRScube-operated LMS Company instances that use the CREATE ACCOUNT feature, the Invite Program column is additionally provided when downloading the User List. (See image)
-
Invite Program:It is the Name of the Program associated with the Invite Url that the User used to sign up.
-
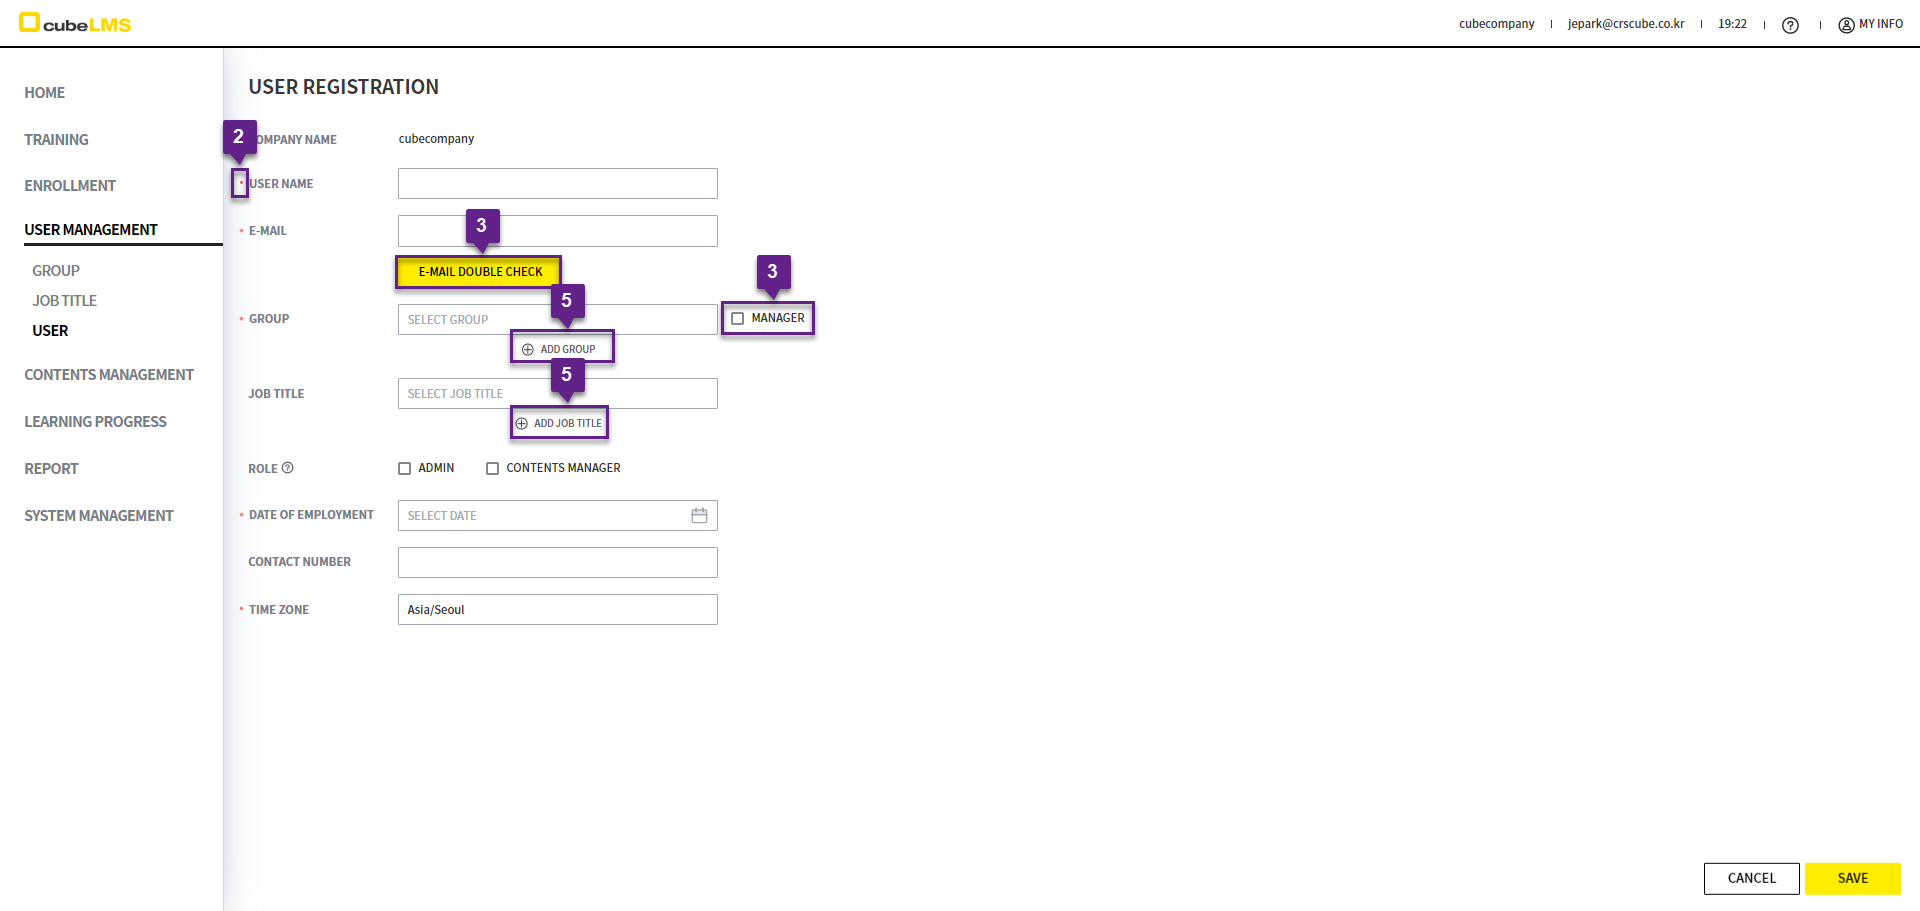
ADD USER(MANUAL)
1. Add button: The screen for registering a new User is displayed.
2. ‘*’ indicates a required field.
3. E-mail Double Check Button: click to register as a User only if it is not duplicated within the Company. (This system uses E-mail as the Id.)
Disposable email domains are likely to be blocked and fail to be delivered due to uncontrollable external factors. Please use a valid official email address to receive system notifications smoothly.
4. Manager button: Check this item to set this User as the Manager of the Group. The Group Manager can check the training status of Trainee members in that Group on the Learning Progress screen. (see ENG_TRAINING (LEARNING PROGRESS) )
5. Add Group, Add Job Title button: A button that lets you add Group and Job Title just like when selecting the Group and Job Title fields.
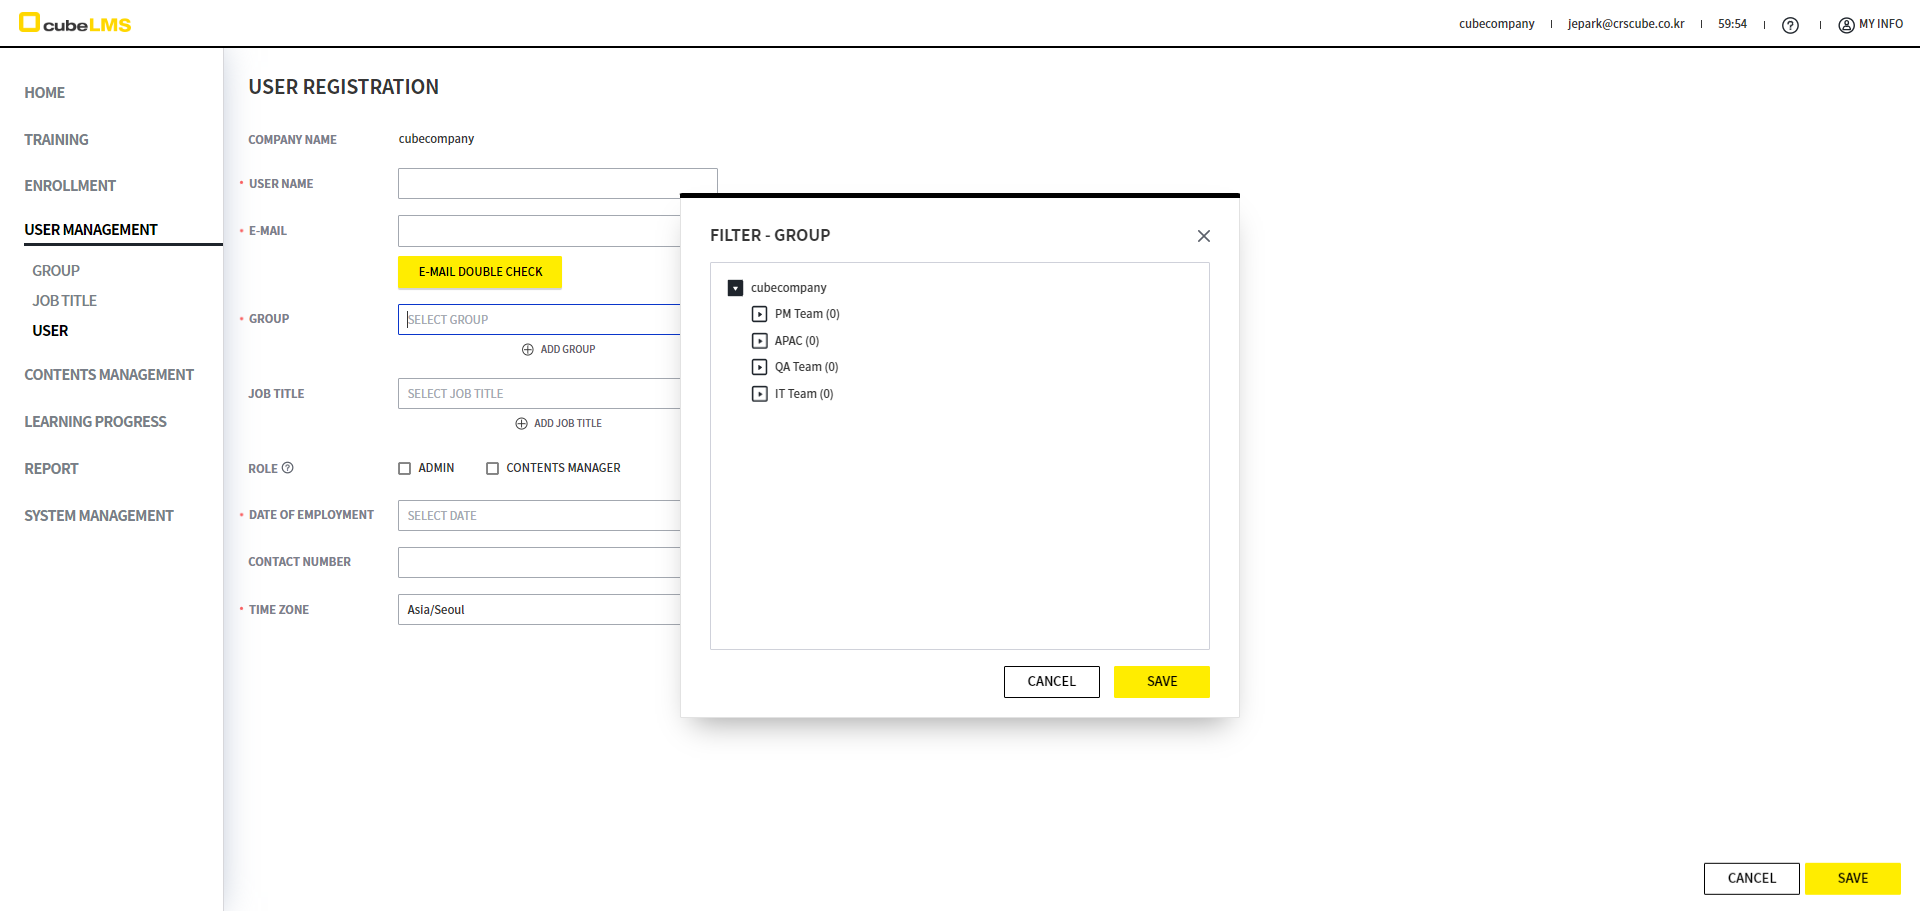
6. Group Click: Group List pops up, and you can select a Group.
7. Select the Group to which the User belongs and click the Save button. Multiple selection is available if the User belongs to multiple Groups.
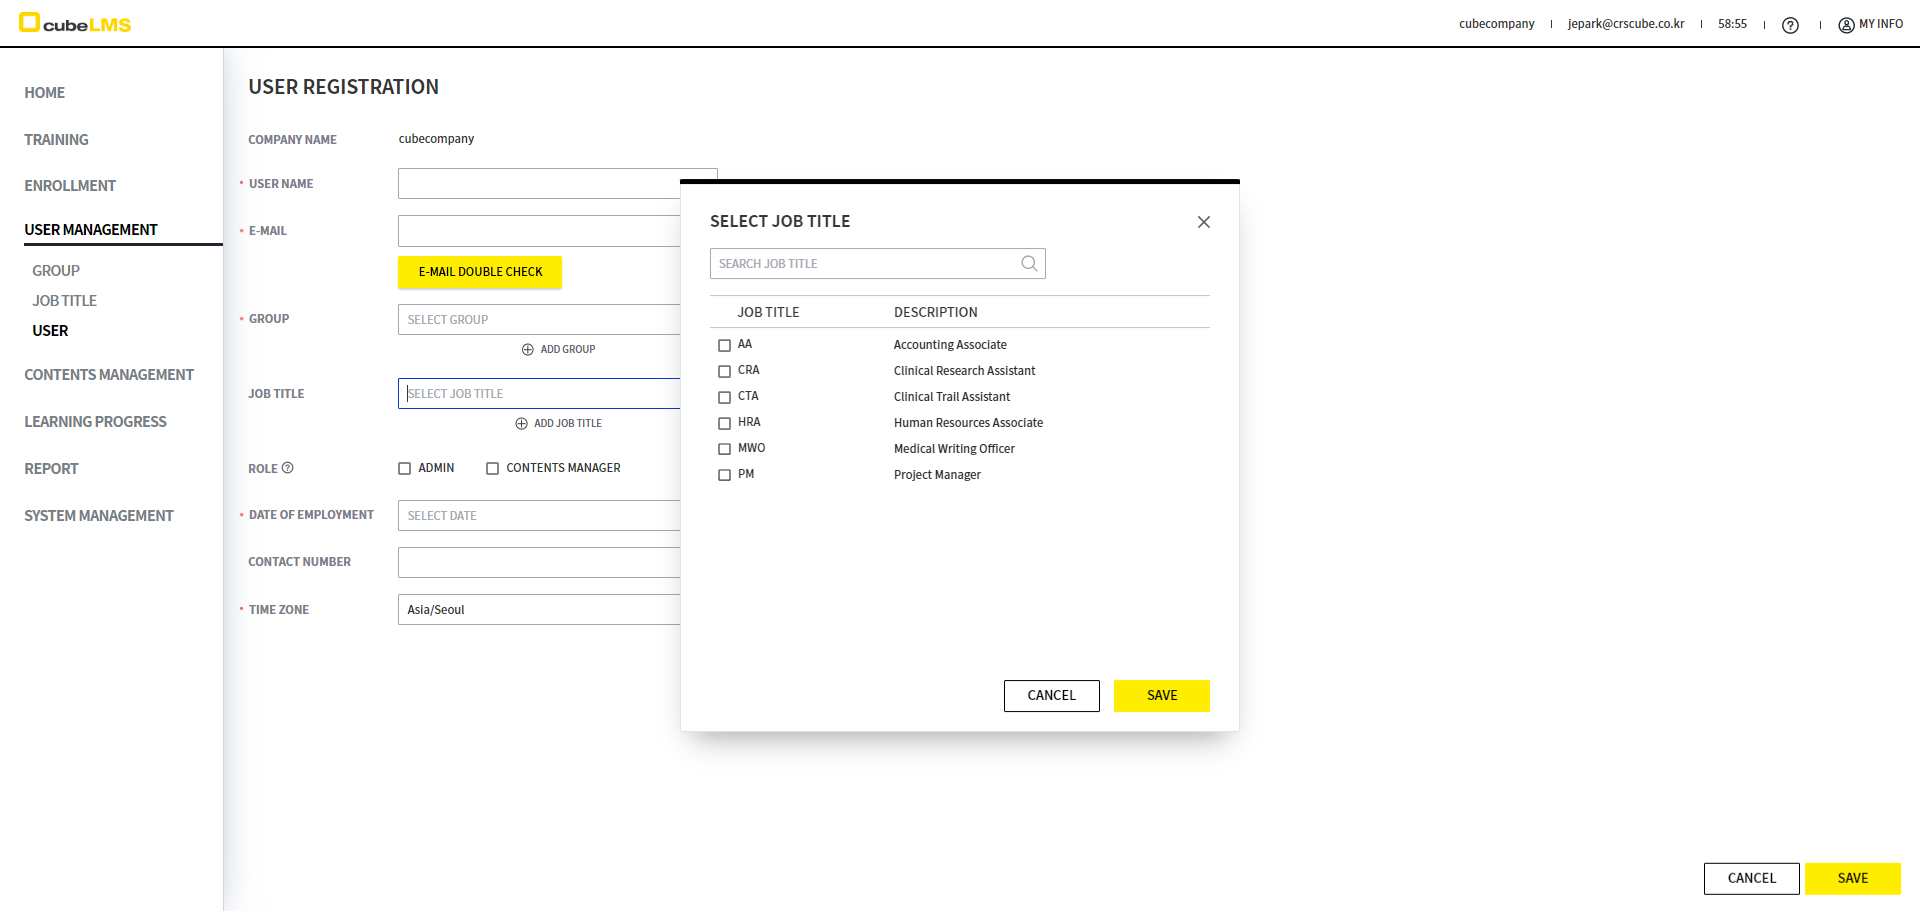
8. Job Title click: Job Title List appears in a pop-up, and you can select a Job Title.
9. Select the User's Job Title and click the Save button. If the User has multiple Job Titles, multiple selections are available.
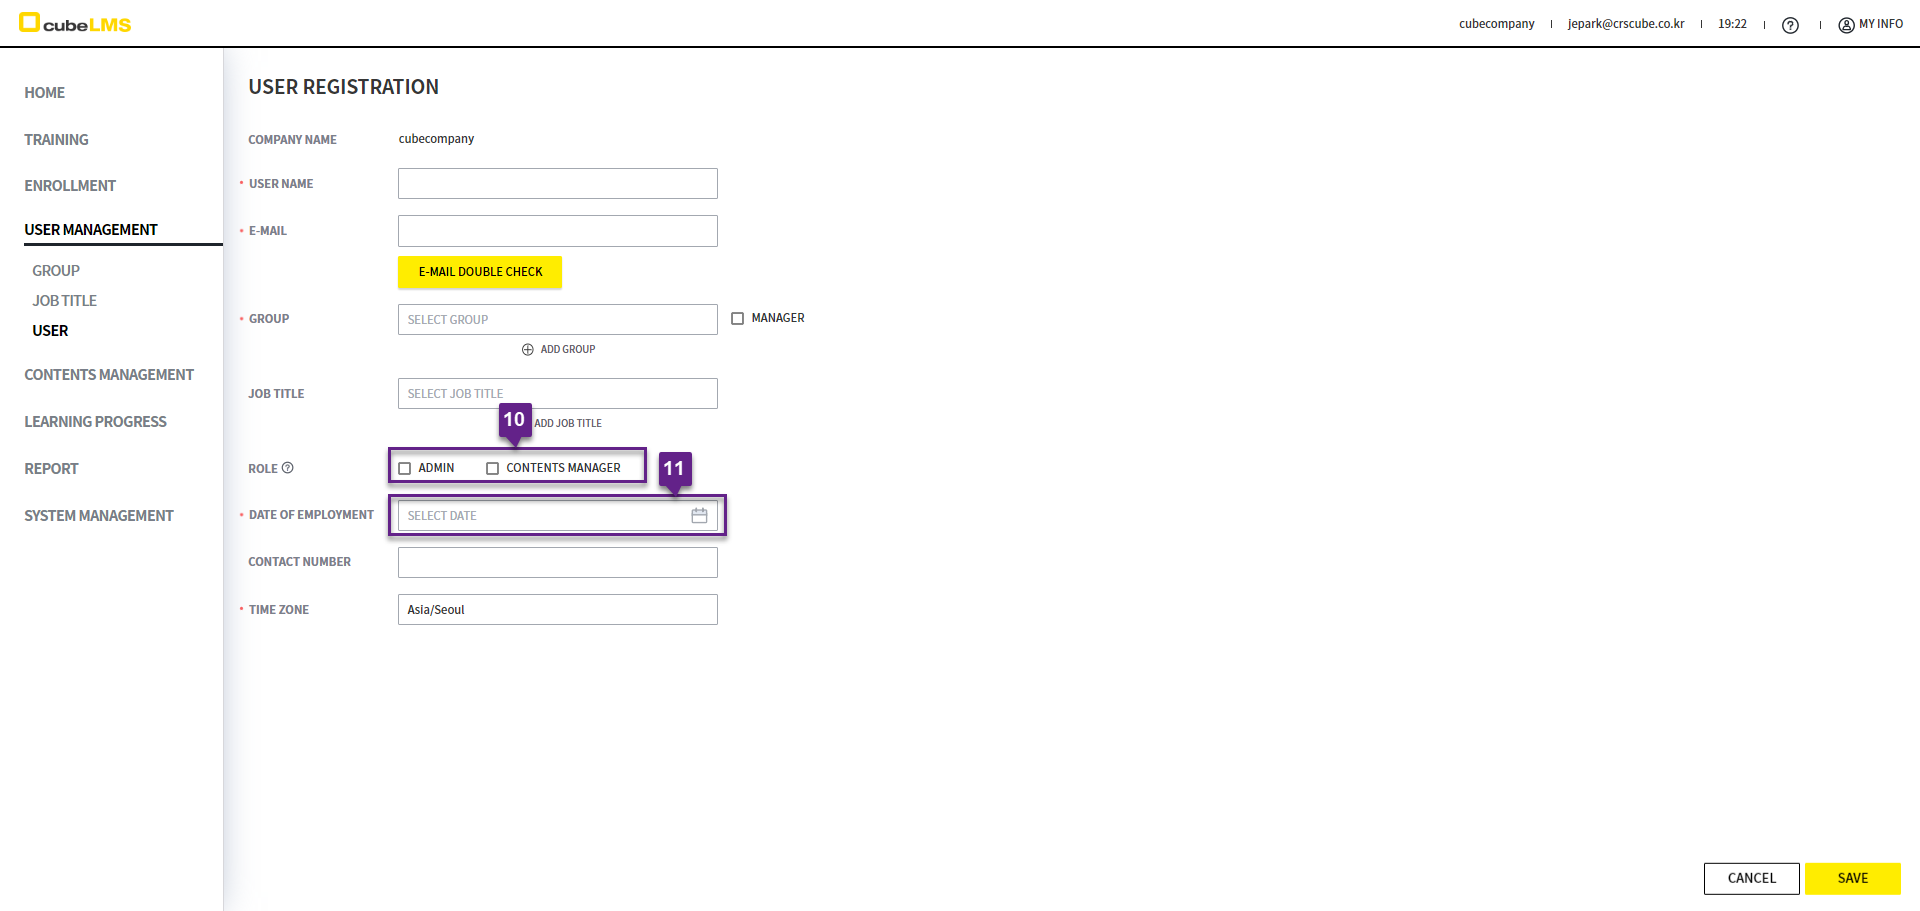
10. Depending on the role, the following Role options are available. See ENG_ROLE & PRIVILEGE for details.
-
Admin:You can register and manage User. You can also view all Training that Contents Manager is currently creating or has registered. -
Contents Manager:You can register and manage Training.
11. DATE OF EMPLOYMENT: You can enter the user's date of employment.
-
After logging in, the first Admin registered in the Company should enter Group and Date of Employment in this menu.
-
For details on the Due Date based on Date of Employment and Training Start Date, see ENG_LECTURE for details.
-
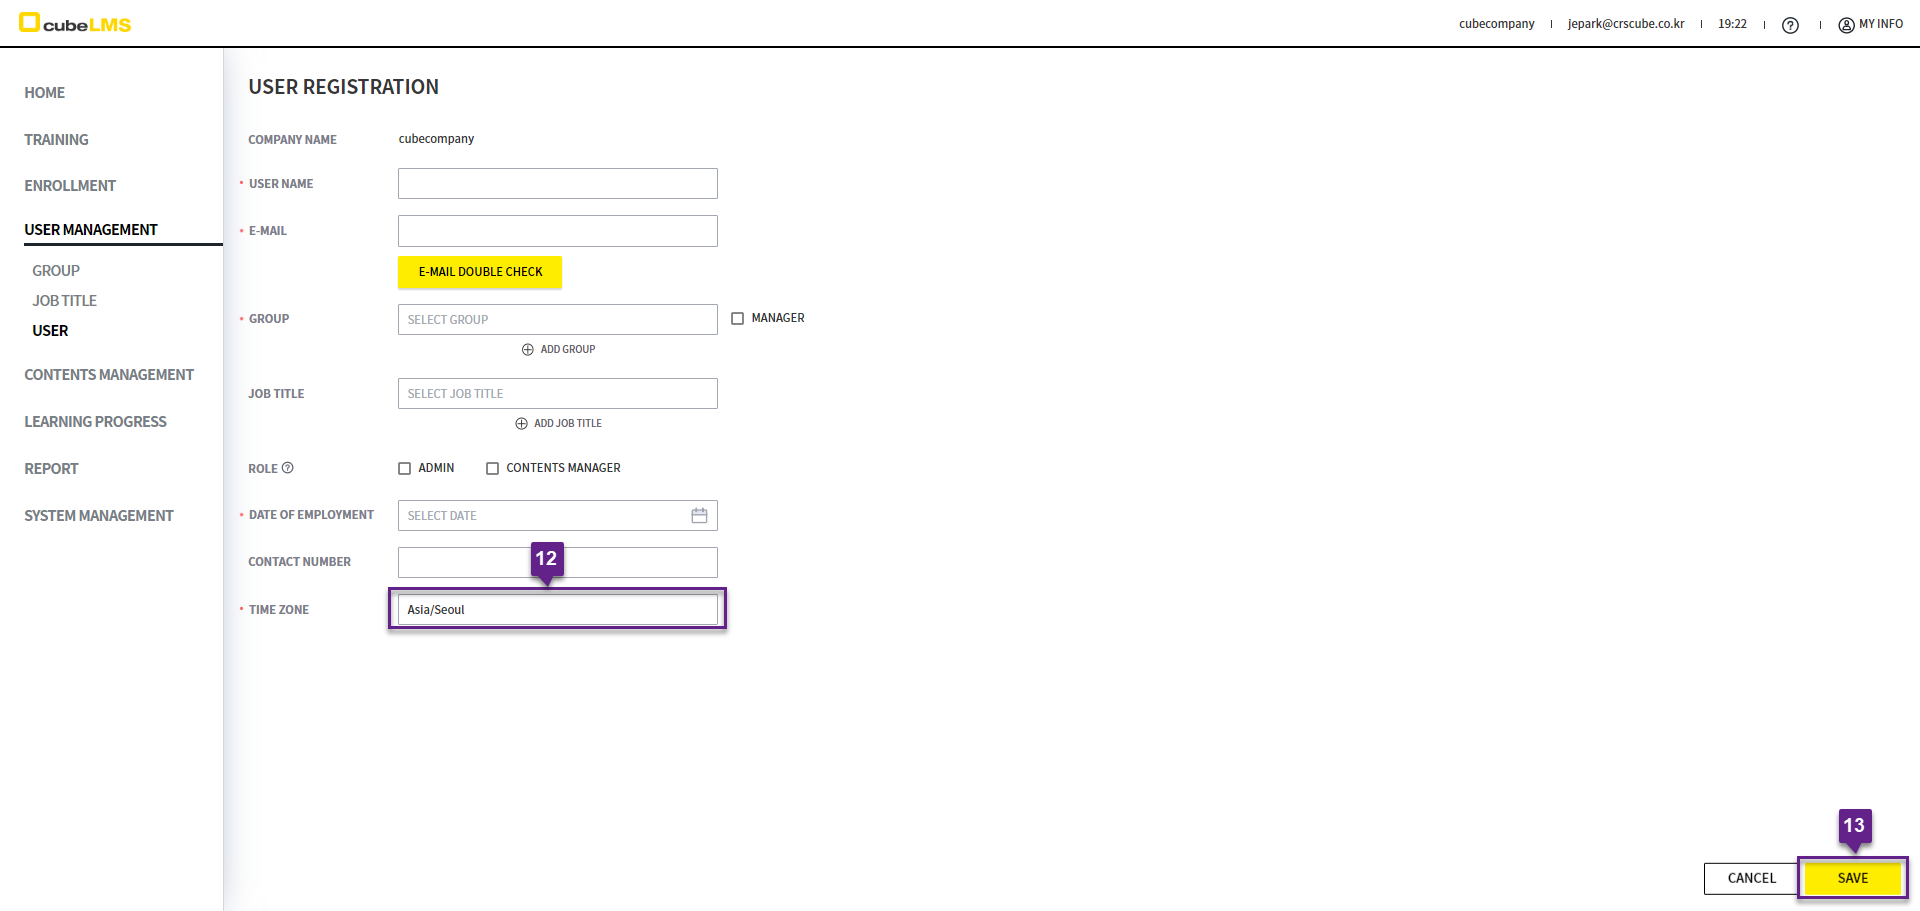
Time Zone:You can select a time zone for each user using Autocomplete Type.
-
On the User creation screen and during User Upload, the Company's Standard Time Zone value stored in the System is displayed automatically.
-
If you select a Time Zone option that observes daylight saving time, the daylight saving time standard is reflected during the applicable period without any separate settings.
-
All date calculations, including every screen where the Time Zone is displayed such as Audit Trail, are displayed according to the configured User Time Zone.
-
However, the following items are displayed according to the Company's Time Zone.
-
Notice -
User, Lecture, and Course Status(E.g Active, Inactive, Expired)
-
-
Accordingly, it is recommended to set the start dates for Lecture and User to future dates.
-
13. Save button: Click this button to create a User.
ADD USER(EXCEL UPLOAD)
You can upload multiple User at once.
1. Form button: You can download the Excel Template.
You cannot register two or more Groups and Job Titles per User when uploading User Excel. If necessary, please edit it on the User detail page after uploading.
2. The downloaded Excel Form contains 2 sheets, and the description for each sheet is as follows.
-
User sheet:This is the sheet for entering USER information to upload. '*' is a required field and must be entered. Please refer to the Code Reference sheet for instructions on how to enter it.

-
Code Reference sheet: User Sheet's column descriptions and the Group and Job Title information that can be entered can be checked. Refer to this information when entering data in the User Sheet.
Lecture column: Only enter the content shown in the green area on the right side of the second sheet (Code Reference).
3. Group, Job Title: Only the content shaded green on the right should be entered.

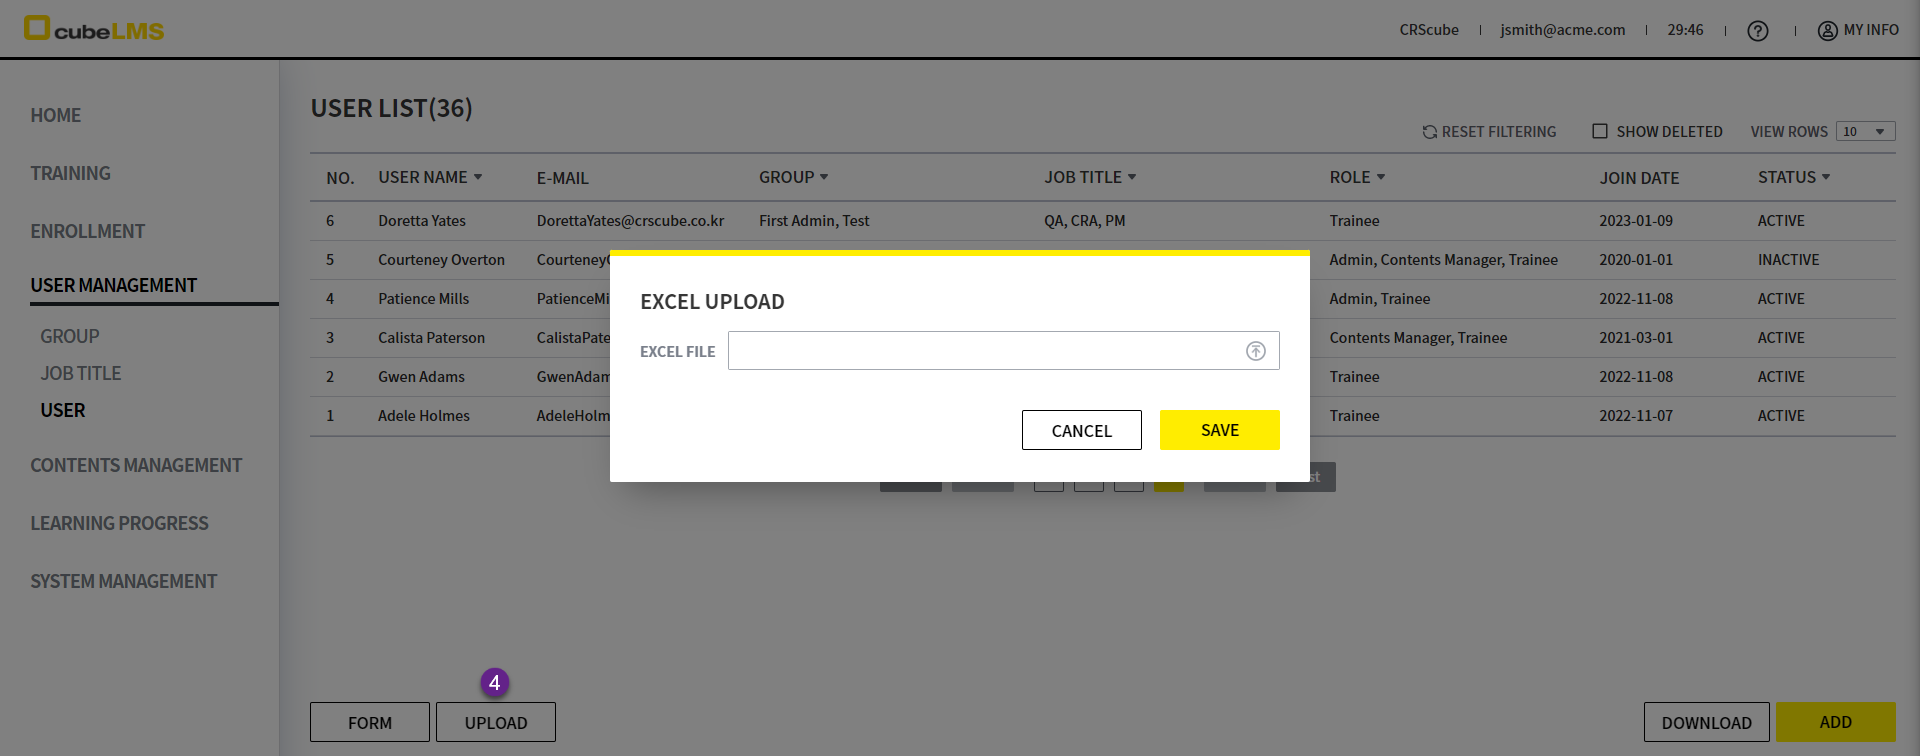
4. Upload button: A popup appears where you can upload the Excel file containing User information. Select the Excel document and upload it.
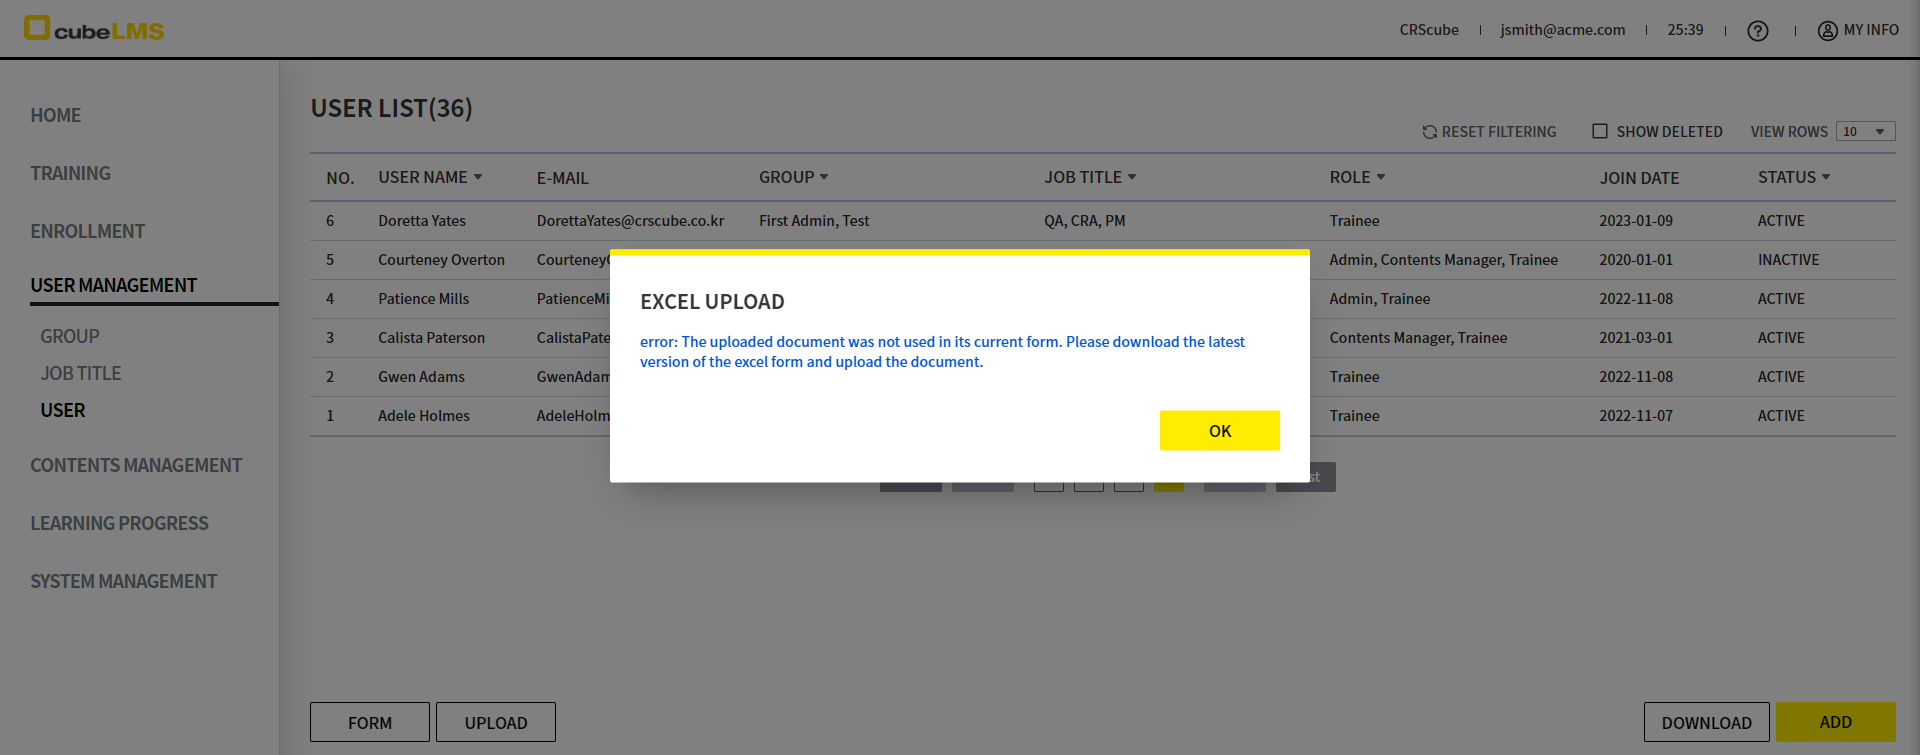
User Sheet If the content entered in the User Sheet does not match the upload format, an error message appears in a pop-up.
Please revise the file according to the error message and upload it again.
Upload may fail in the following cases.
1) If the Upload file contains entries that differ from the Code Reference or required input values are missing
2) Entering a duplicate E-mail that matches a User registered in the Company
3) If duplicate E-mail addresses are entered in the same Excel file
4) If the data is entered in a format that does not match the field (e.g., entering text in Date of employment).
5) in the Excel Form the input format specified is not 'General' or 'Text'
6) Excel Form if Group or Job Title has changed after you downloaded the Excel Form and the file is no longer the latest version
5. Once the upload is complete, the uploaded User appears in the List.
EDIT USER
1. Click a row to open the detail page where you can edit User information.
2. ACTIVE PERIOD: This means the active period of the User account.
-
The start date is automatically set to the system date when the User is registered. After registration is complete, click the user's row to change the start date to a future date.
-
If a future date is set as the start date, the User will be Inactive until that date arrives and cannot access the Company or system.
-
The end date is automatically set to [9999-12-31]. After registration, click the User to change the end date to a date after today. When that date arrives, the User will be Inactive and cannot access this system.
3. Deleted check: User can be deleted.
