In this menu, you can register and manage Lecture.
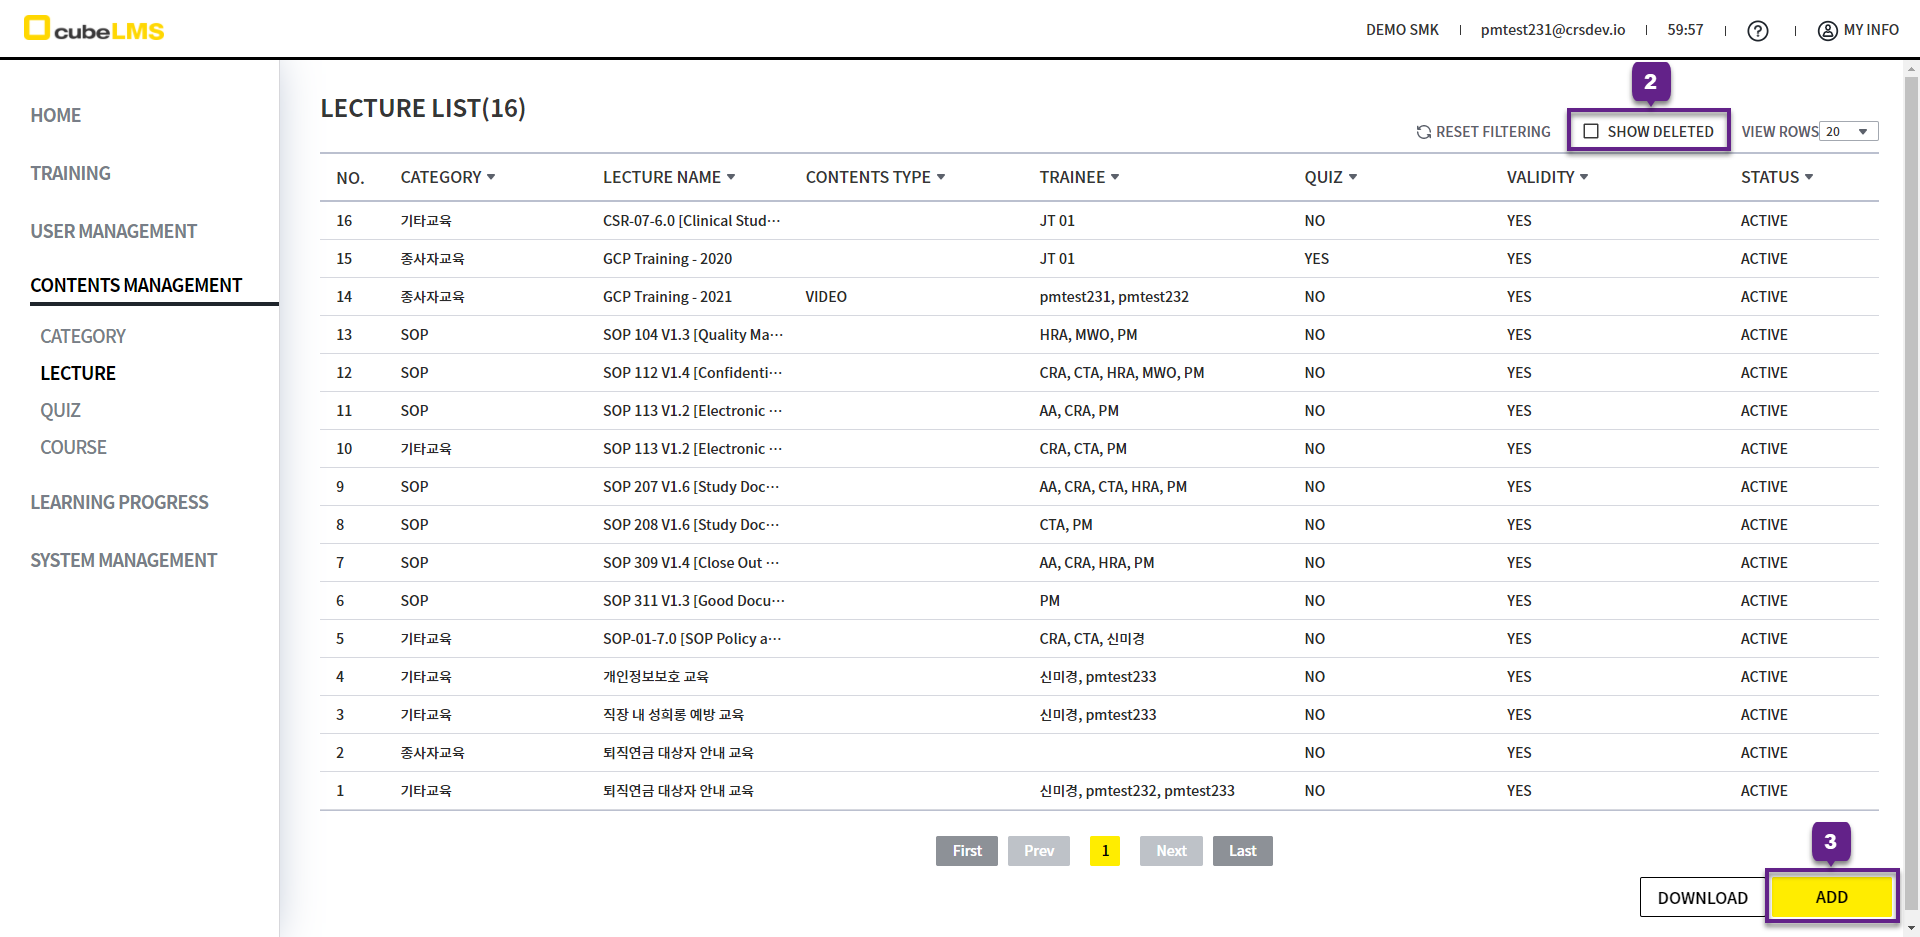
LECTURE LIST
1. Click each row to go to the Lecture details page.
2. Show Deleted: If checked, you can view deleted Lecture.
3. Add button: You can create a Lecture.
ADD LECTURE
1. Click the Add button to create a Lecture.
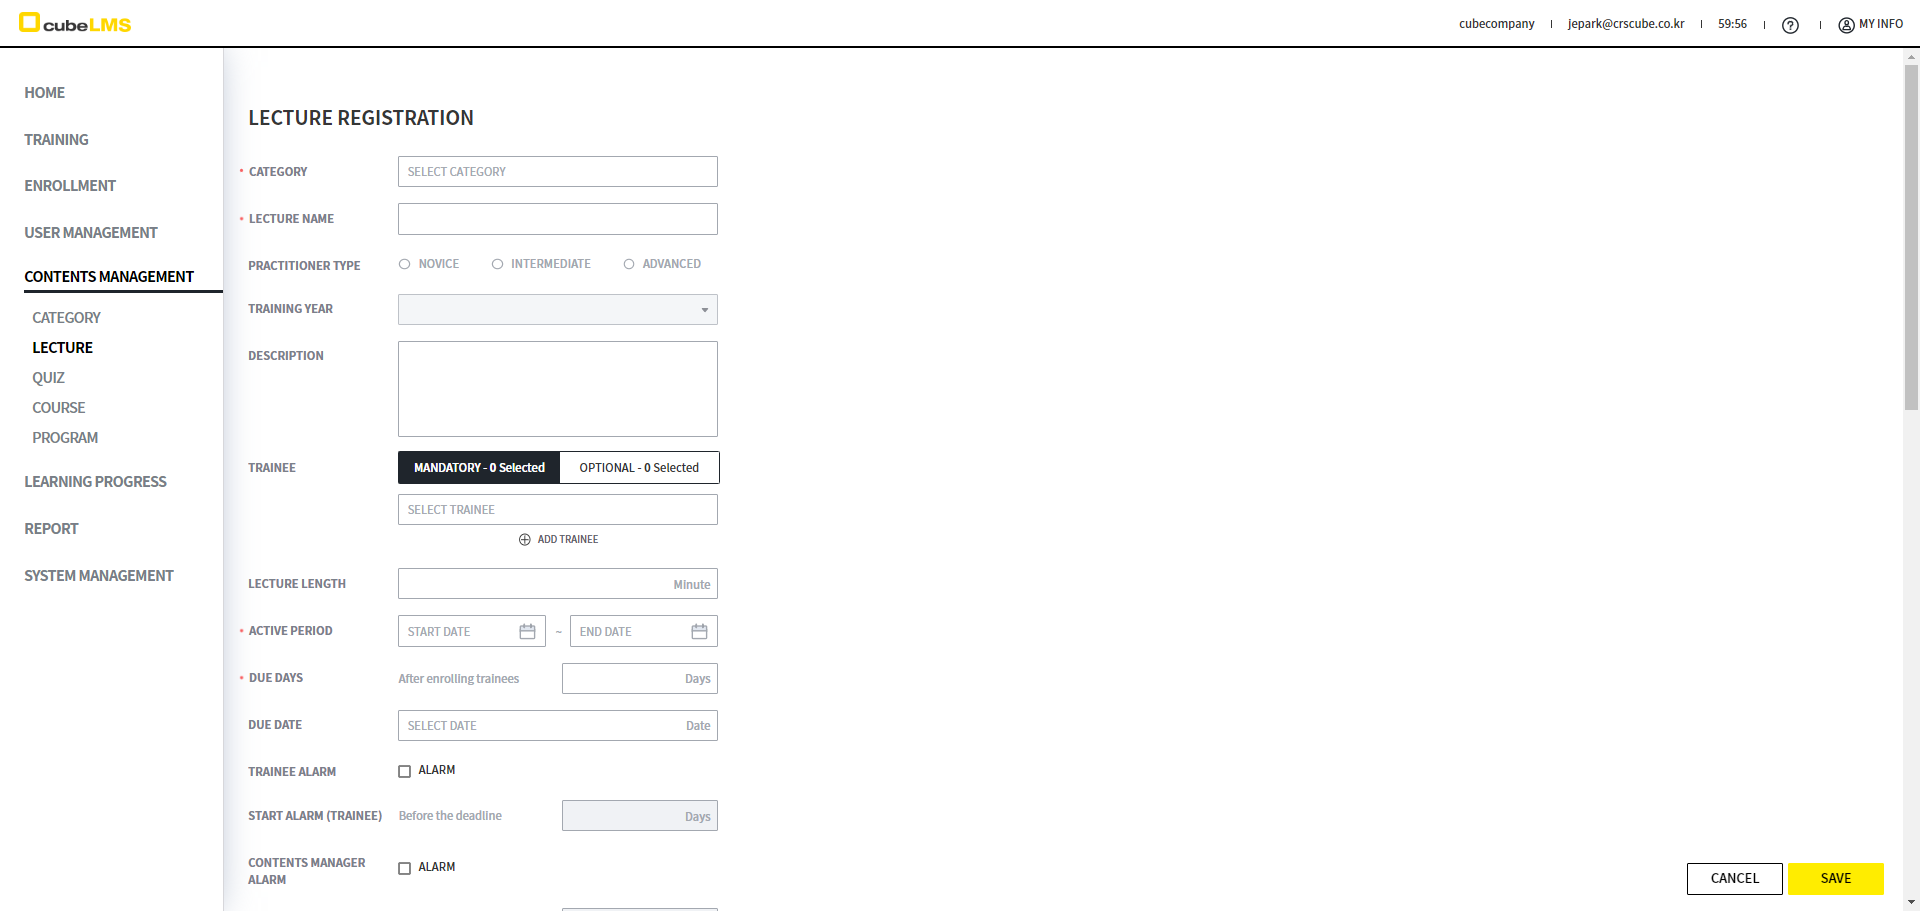
ADD LECTURE - LECTURE INFO
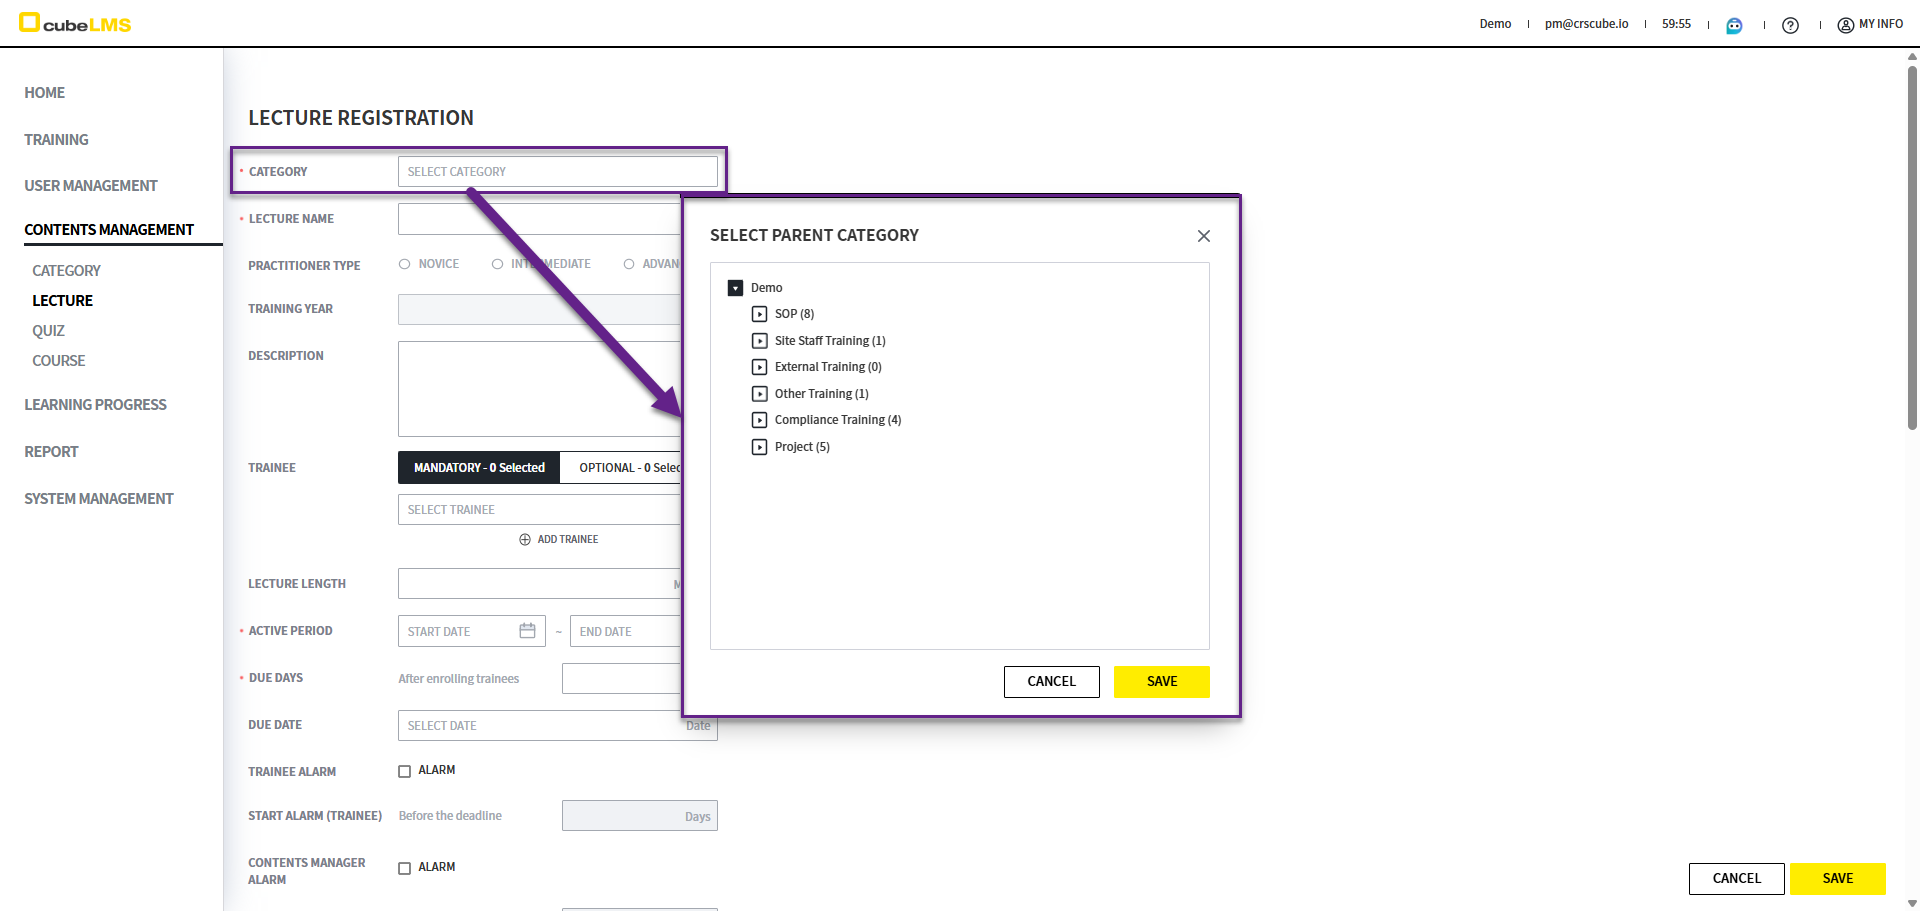
1. Category: Click it to display the category hierarchy. You can select the category that Lecture will belong to.
If it is created as a default Category (SOP, Employee Training, External Training, Previous Training, Other Training), it cannot be changed to another Category.
2. '*' indicates a required field.
3. Practitioner Type, Training Year: It is enabled only when Practitioner Training or its subcategories are selected.

4. Training Type: You can assign Trainee by selecting each tab. The contents entered in Category are automatically applied as the default values, and you can edit them later.
-
Mandatory:Assigned to the relevant Trainee as required. -
OPTIONAL:The relevant Trainee can select the Lecture in the Optional tab and take it.-
ENG_OPTIONAL page lists the details.
-
-
Trainees already selected in another Training Type are disabled and cannot be selected.
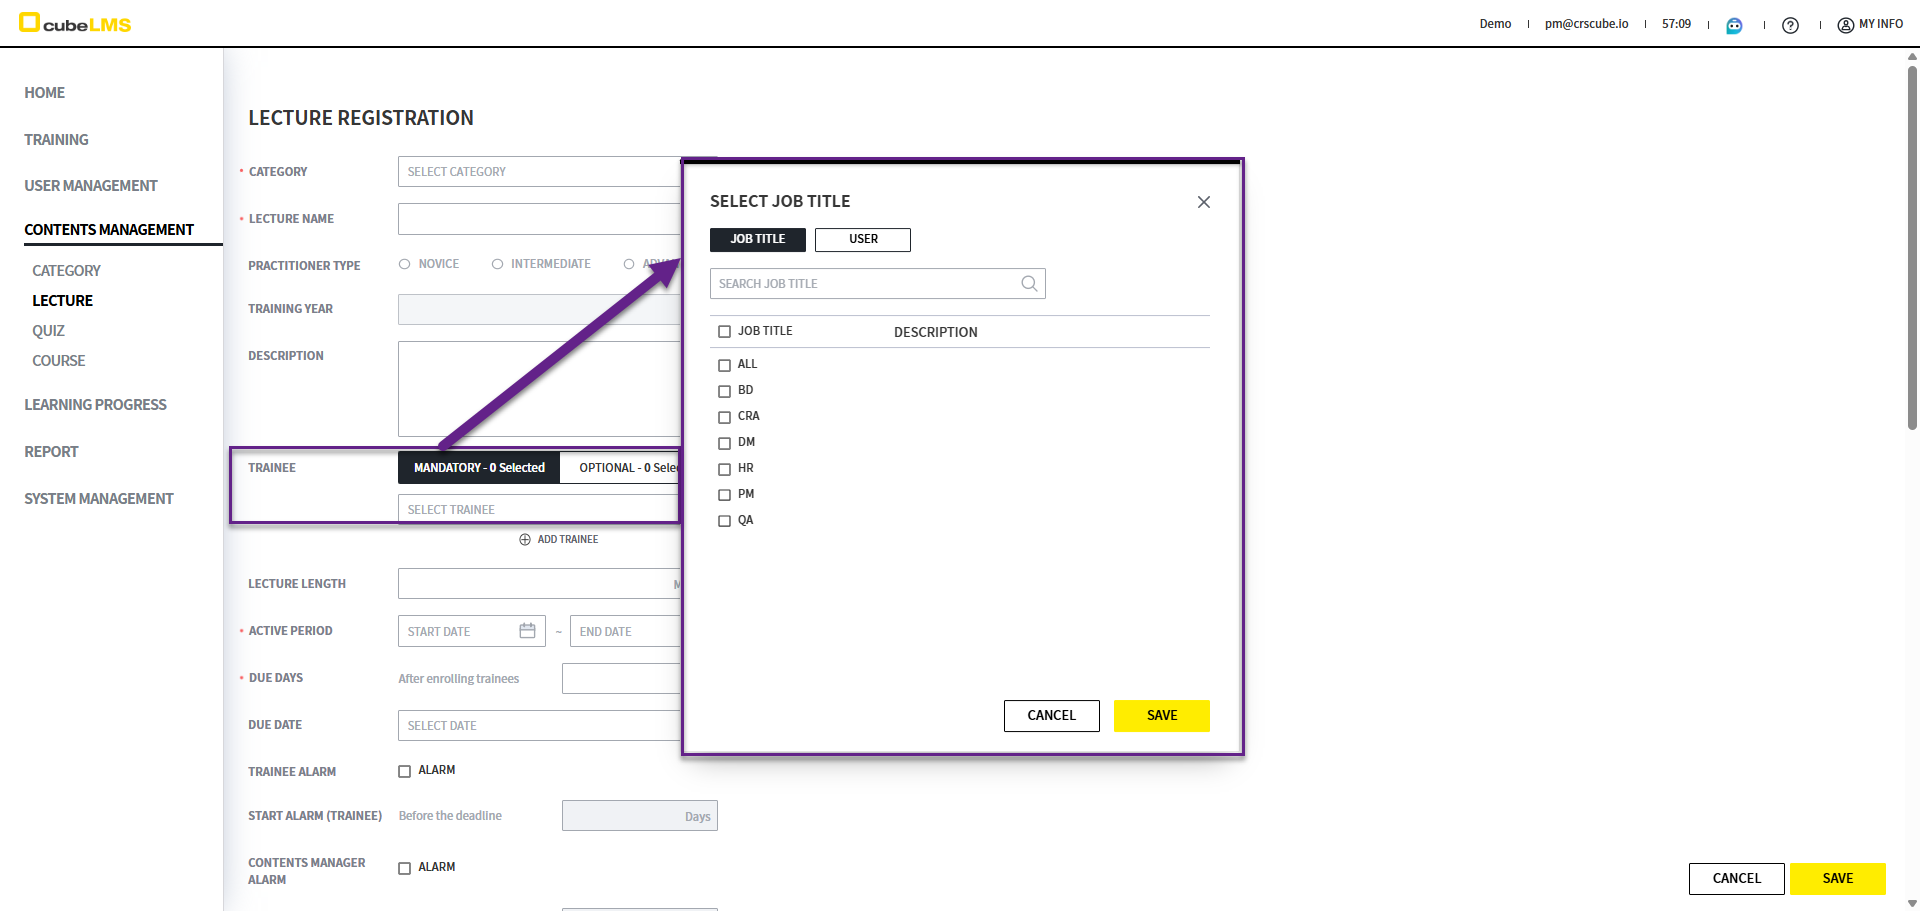
5. Trainee: Specify the Trainee to assign to the Lecture. When you click this field, a pop-up appears where you can select a Trainee. You can assign by Job Title or User, and you can also combine both. If the same User is assigned to both Mandatory and Optional, Mandatory takes precedence.
-
Job Title:The Lecture is assigned to all trainees with the selected Job Title. -
User:The Lecture is assigned only to the selected User.
Deleted or deactivated User is not displayed in the list.
6. Lecture Length: This indicates the lecture duration.
7. Active Period: It refers to the period during which the Lecture is active, and you can enter the start and end dates. Based on Today, past dates cannot be entered, and if it is not within the active period, the Lecture is not assigned to the Trainee.
If you set the start date to Today, it is assigned to the Trainee immediately after saving. For sufficient review time, we recommend setting the start date to a date later than Today.
The detailed explanation of Lecture Status according to Active Period is as follows.
-
Inactive:Start Date > Today, and it is not assigned to Trainee until the Lecture becomes Active. -
Active:Start Date ≤ Today ≤ End Date, and the Lecture is active. -
Expired:End Date < Today, and the Lecture is no longer assigned to Trainee.
8. Please check this item on the page below.
9. Trainee Alarm: When checked, an email notification is sent when the lecture due date approaches. By default, the content entered in Category is automatically applied, and you can edit it.
10. Start Alarm(Trainee): Lecture completion notification emails can be scheduled. The deadline is calculated and applied according to the Due Date of the registered Lecture. For example, if Start Alarm(Trainee) is set to 3 Days, alarm emails are sent starting 3 days before the Due Date. By default, the content entered in Category is automatically applied and can be modified.
11. Contents Manager Alarm: When checked, an alert email is sent when the Lecture's expiration date approaches. By default, the content entered in Category is automatically applied and can be edited.
12. Start Alarm(Contents Manager): You can set when notification emails about Lecture expiration are sent. The setting is calculated and reflected according to the registered Lecture's Active Period > End Date. For example, if Start Alarm(Contents Manager) is set to 3 Days, notification emails are sent starting 3 days before the Active Period's End Date. The setting configured when you register a Lecture in the relevant Category is automatically applied, and you can edit it on the lecture registration and detail screens. By default, the content entered in Category is automatically applied and can be edited.
13. ATTACHMENT: When checked, a field is created that allows Trainee to upload documents such as certificates. If checked, Attachment upload is included in the completion criteria for Lecture.
14. Complete Date: You can set the completion criteria for the Lecture.
-
Auto Assign:The system automatically sets the Complete Date when the lecture is completed. -
Trainee Assign:The Trainee must select the Complete Date directly. (Use this setting for external training.)
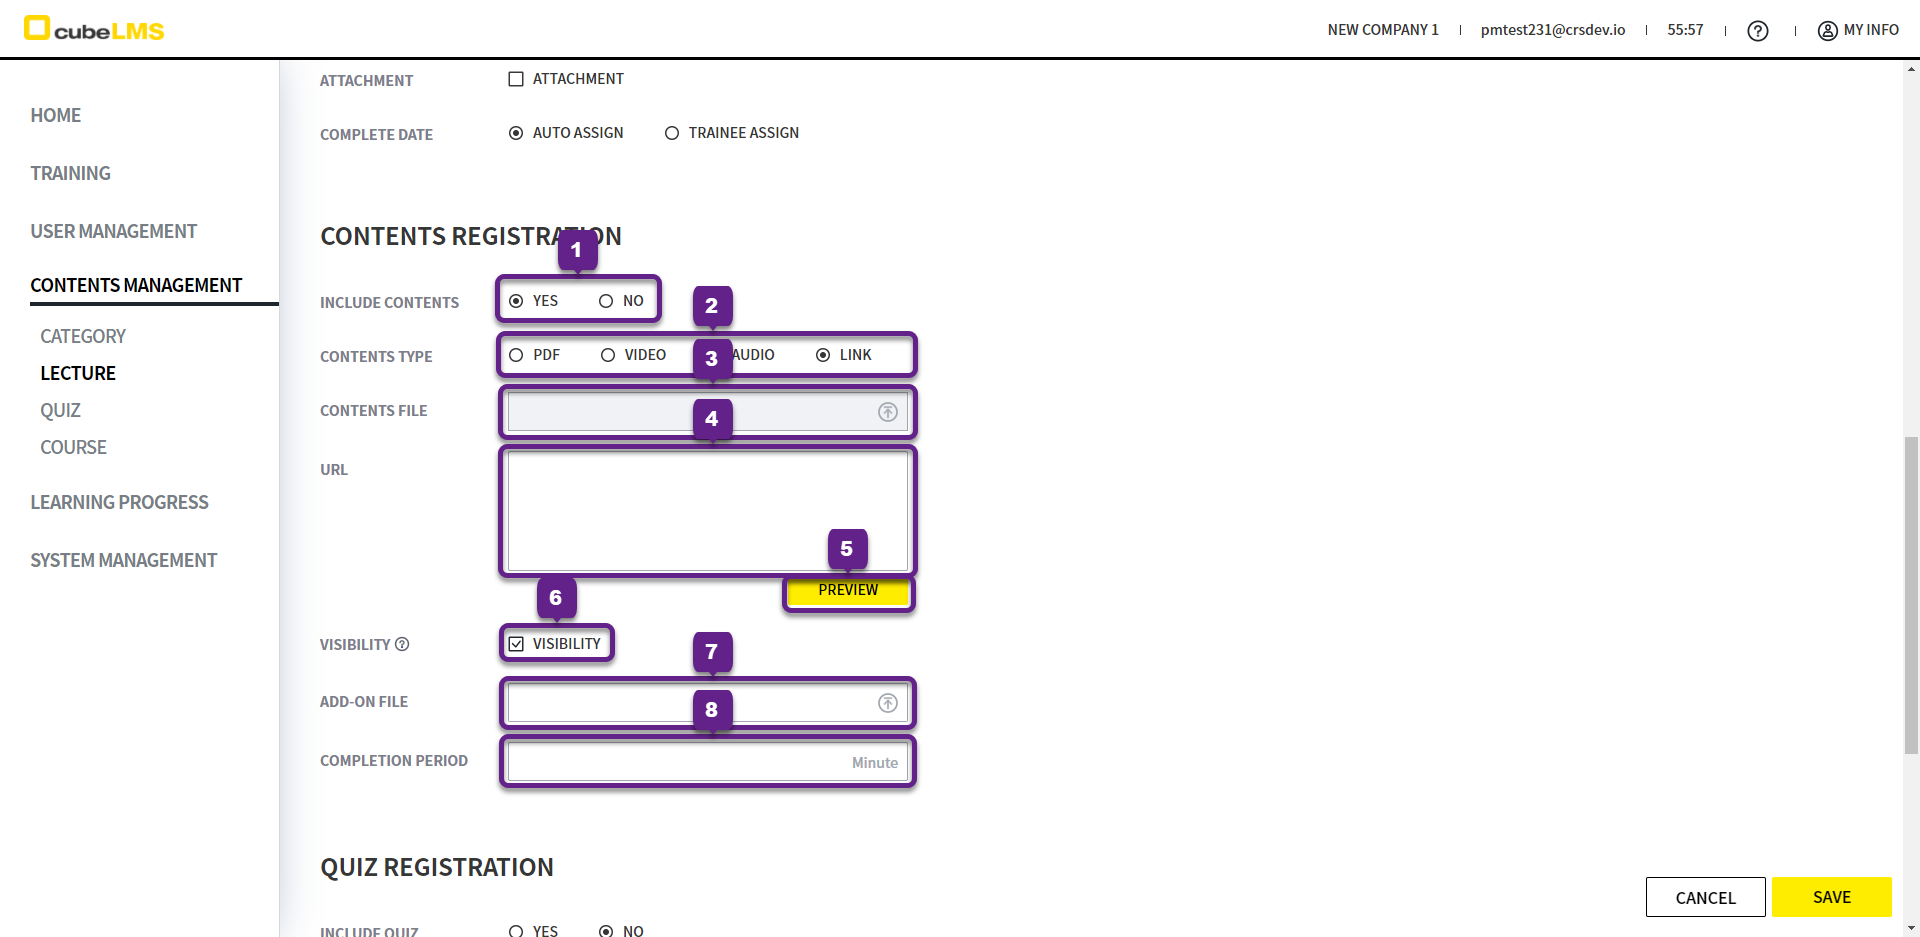
ADD LECTURE - CONTENTS
1. Include Contents: You can choose whether to include Contents in this Lecture. If you select Yes, the subfields below are enabled.
2. Contents Type: You can select the type of Contents included in the Lecture from Pdf, Video, Audio, or Link.
3. Contents File: It is enabled when Contents Type is Pdf, Video, or Audio. You can upload the Contents File that will be shown when attending the lecture.
You can upload files up to 600mb.
For Video files, avi-format files require a separate codec installation and cannot be played in the default browser. We recommend mov instead of avi.
4. URL: It is enabled when Contents Type is Link. You can enter the Url to view during the Lecture.
5. Preview button: You can open the entered Url in a new window to view the content.
6. Visibility: You can specify whether to display the additional file. If checked, Add-on File below is activated.
7. Add-on File: You can upload additional files. If a file has been uploaded, you can download the uploaded file from the corresponding Training detail screen.
8. Completion Period: You can set the completion criteria time for the Contents. For example, if you set it to 90 Min, you must keep the Contents active for at least 90 minutes before the Done button is enabled.
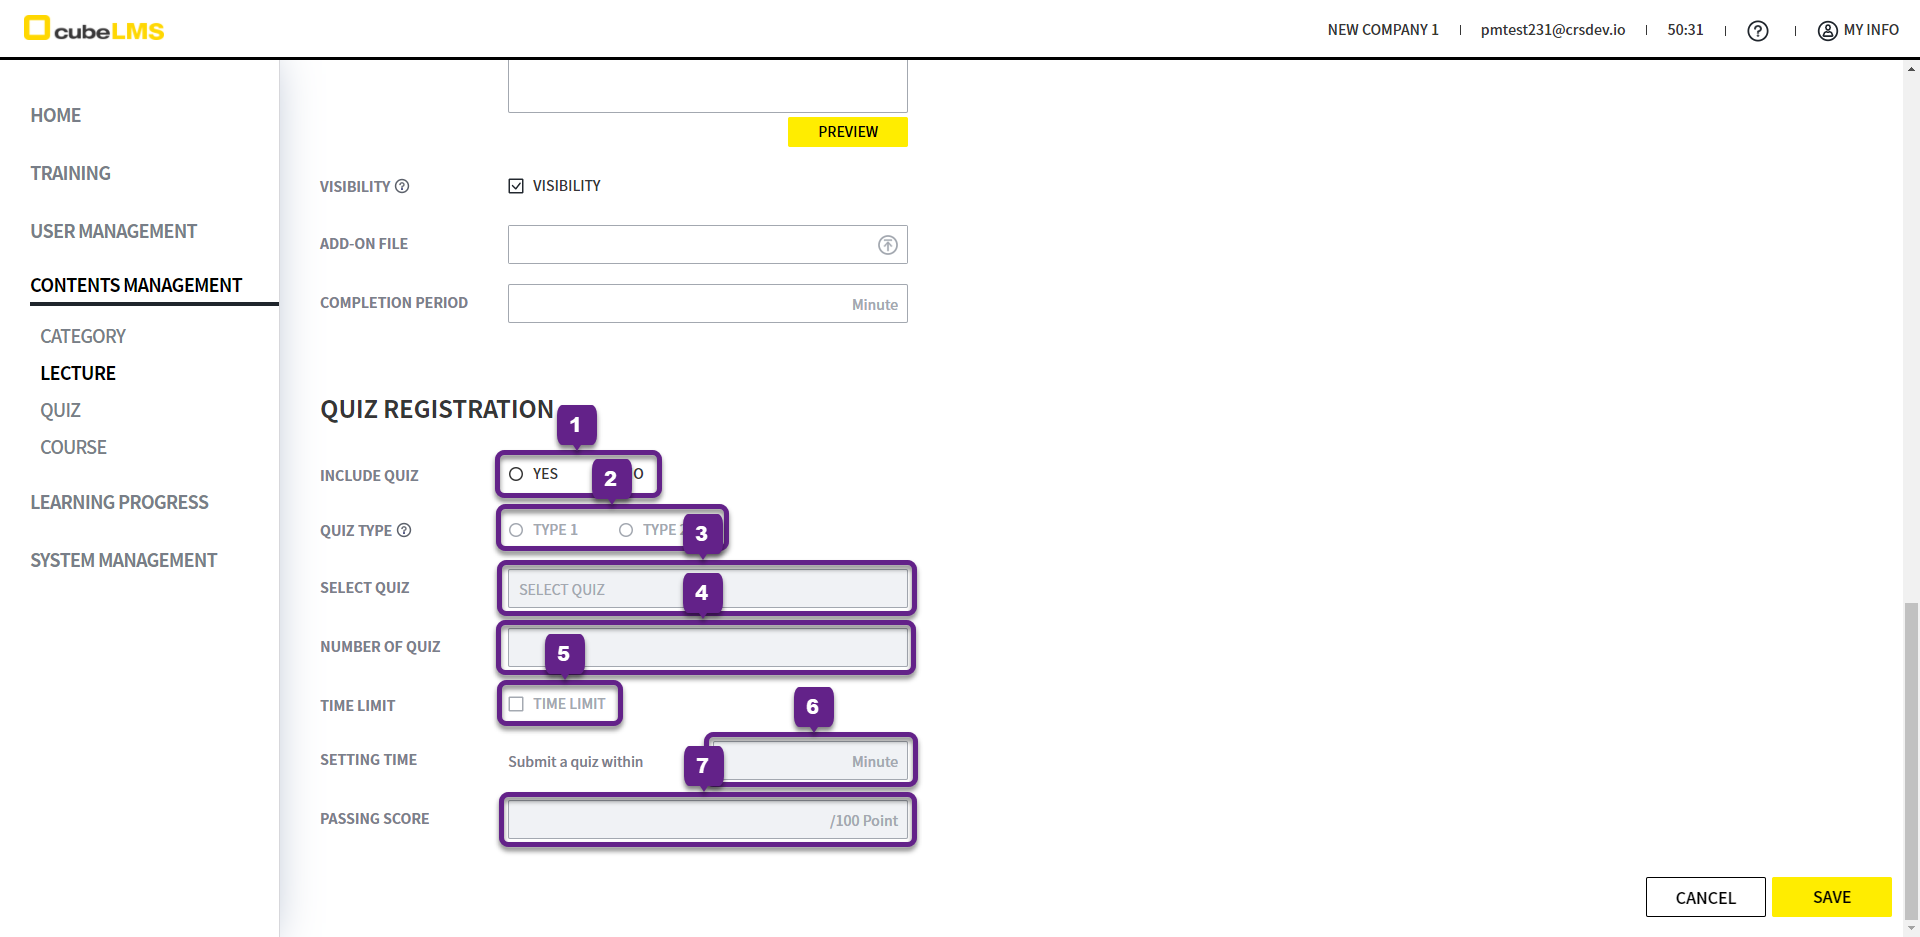
ADD LECTURE - QUIZ
1. Include Quiz: You can choose whether to include a Quiz in the Lecture. If Yes is selected, the subfields are activated.
2. Quiz Type: You can select the Type of quiz to be included in the Lecture.
-
Type 1:If you click an incorrect answer in an individual question, you cannot move to the next question.Type 2:If you click an incorrect answer in an individual question, you can move to the next question, but if the final Score is lower than the Passing Score, it is recorded as Fail, and you can retake the quiz.
3. Select Quiz: You can register quizzes in the Quiz menu, not when registering a Lecture. If you select a Lecture in the Quiz menu to register it or upload it in bulk, the quiz name is automatically reflected in the corresponding item.
For more details about quiz registration, please refer to the ENG_QUIZ menu.
4. Number of Quiz: The number of quizzes the Trainee must solve. When registering quizzes, you must register at least as many questions as Number of Quiz. If the Number of Quiz specified in the Lecture menu is greater than the number of questions registered in the Quiz menu, questions are selected at random.
5. Time Limit: You can select whether to enable the quiz time limit. If checked, Setting Time is activated.
6. Setting Time: You can enter the time limit to be assigned to each quiz in minutes.
7. Passing Score: Enter the score that will be marked as Pass only when it is at or above a certain score. If Quiz Type is 1, Passing Score is automatically set to 100 points.
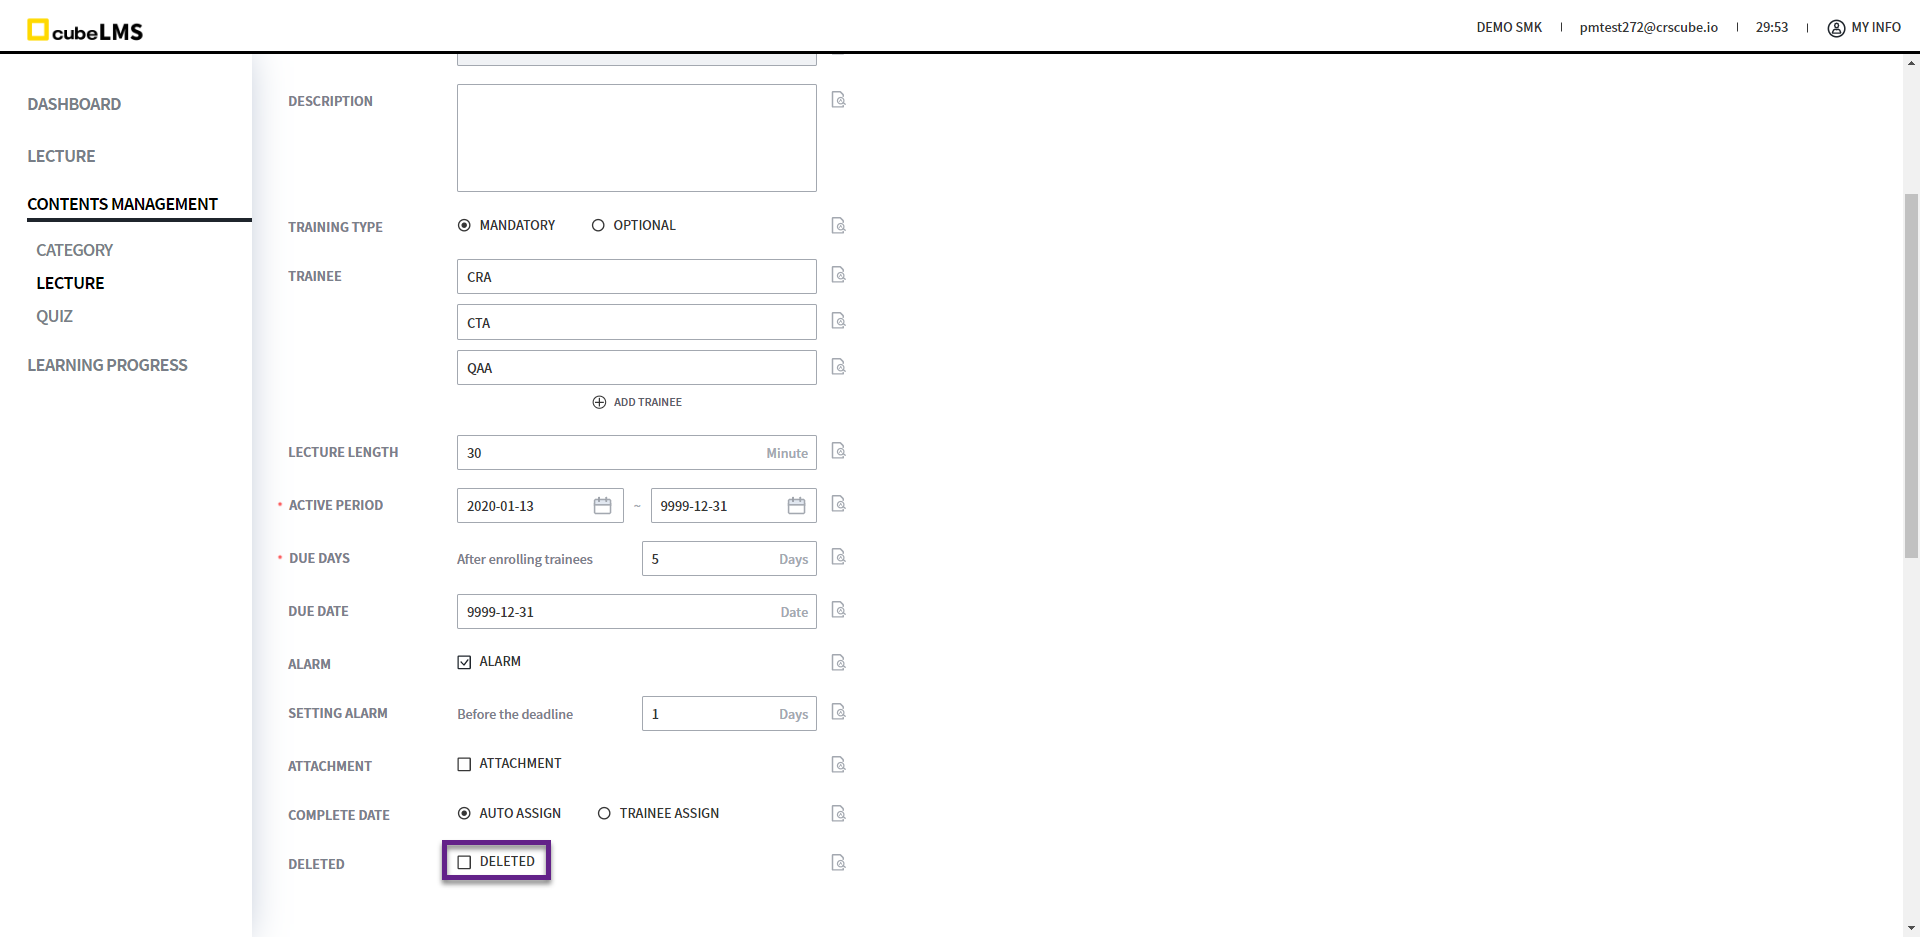
EDIT LECTURE
1. Click each row to open the details page where you can edit the Lecture information.
2. Lecture can be deleted or restored.
However, if there is a Trainee who has already completed the Lecture, that Lecture cannot be deleted.
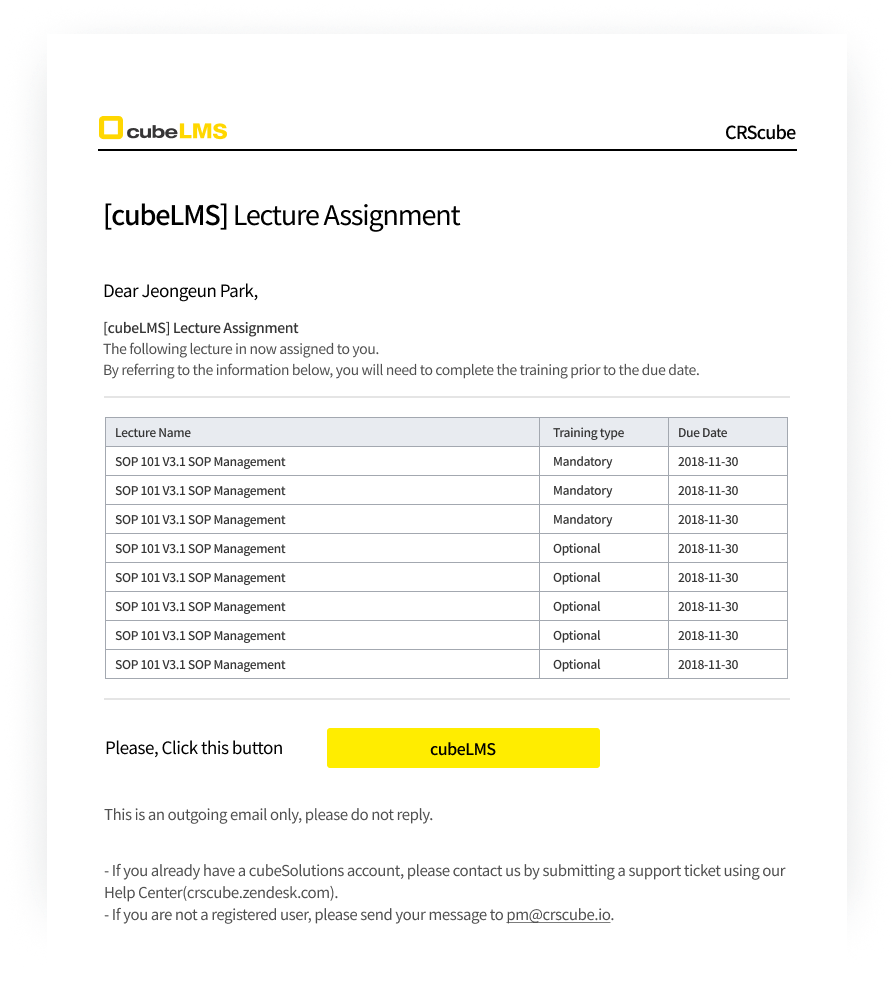
ALARM MAIL-LECTURE ASSIGNMENT
When a Mandatory, Optional Lecture is assigned, an email notification about the lecture assignment is sent.
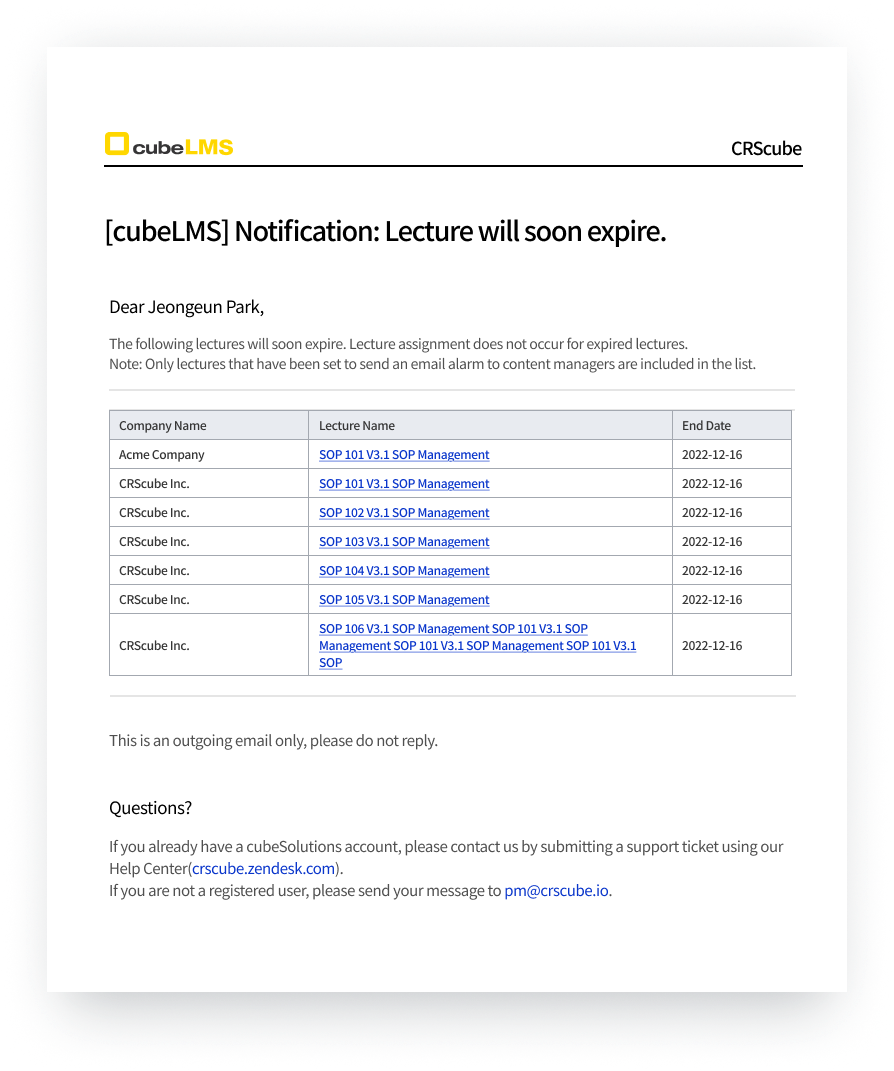
ALARM MAIL-LECTURE WILL SOON EXPIRE.
An alert email is sent when the Active Period End Date is reached, according to the settings for Contents Manager Alarm.