GROUP menu lets you register and manage your company's departments.
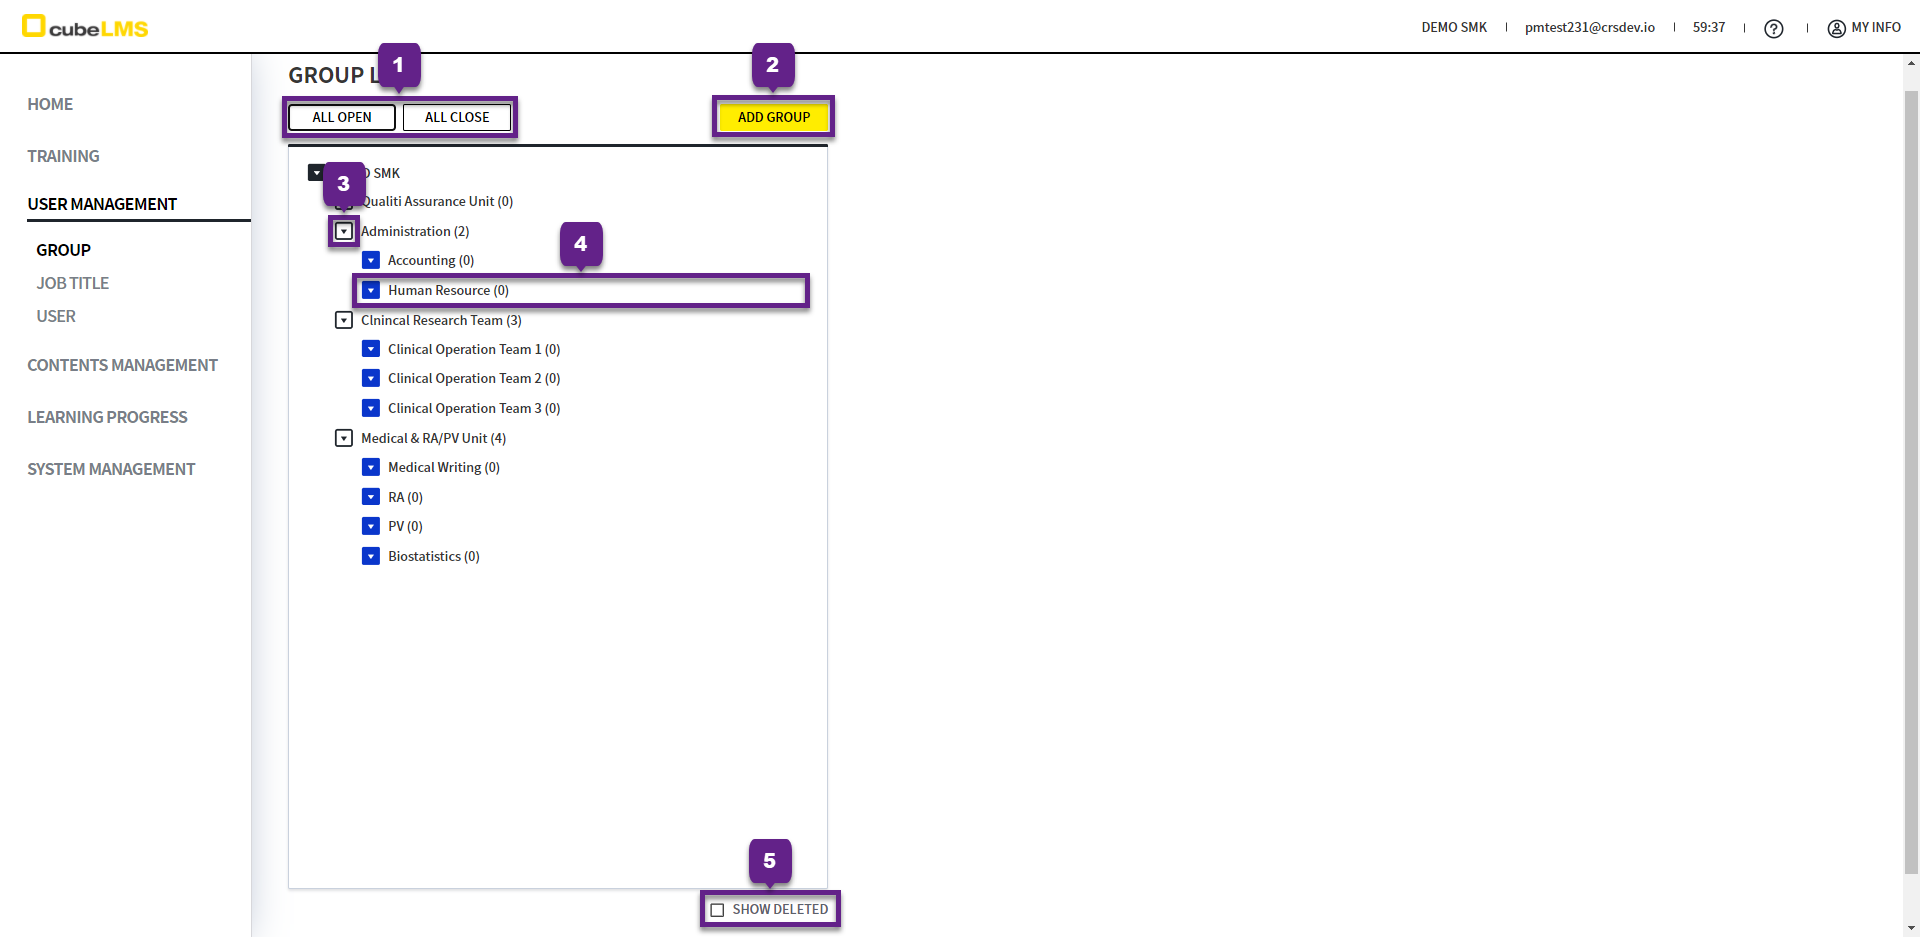
GROUP LIST
1. All Open, All Close button: You can expand or collapse the group hierarchy all at once.
2. Add Group button: You can add a Group.
If there is a subordinate Group, click the inverted triangle icon to expand or collapse the Group.
You can change the order of Group within the same Level by Drag & Drop. However, you cannot move it to a different Level.
5. Show Deleted Check: You can view deleted Group.
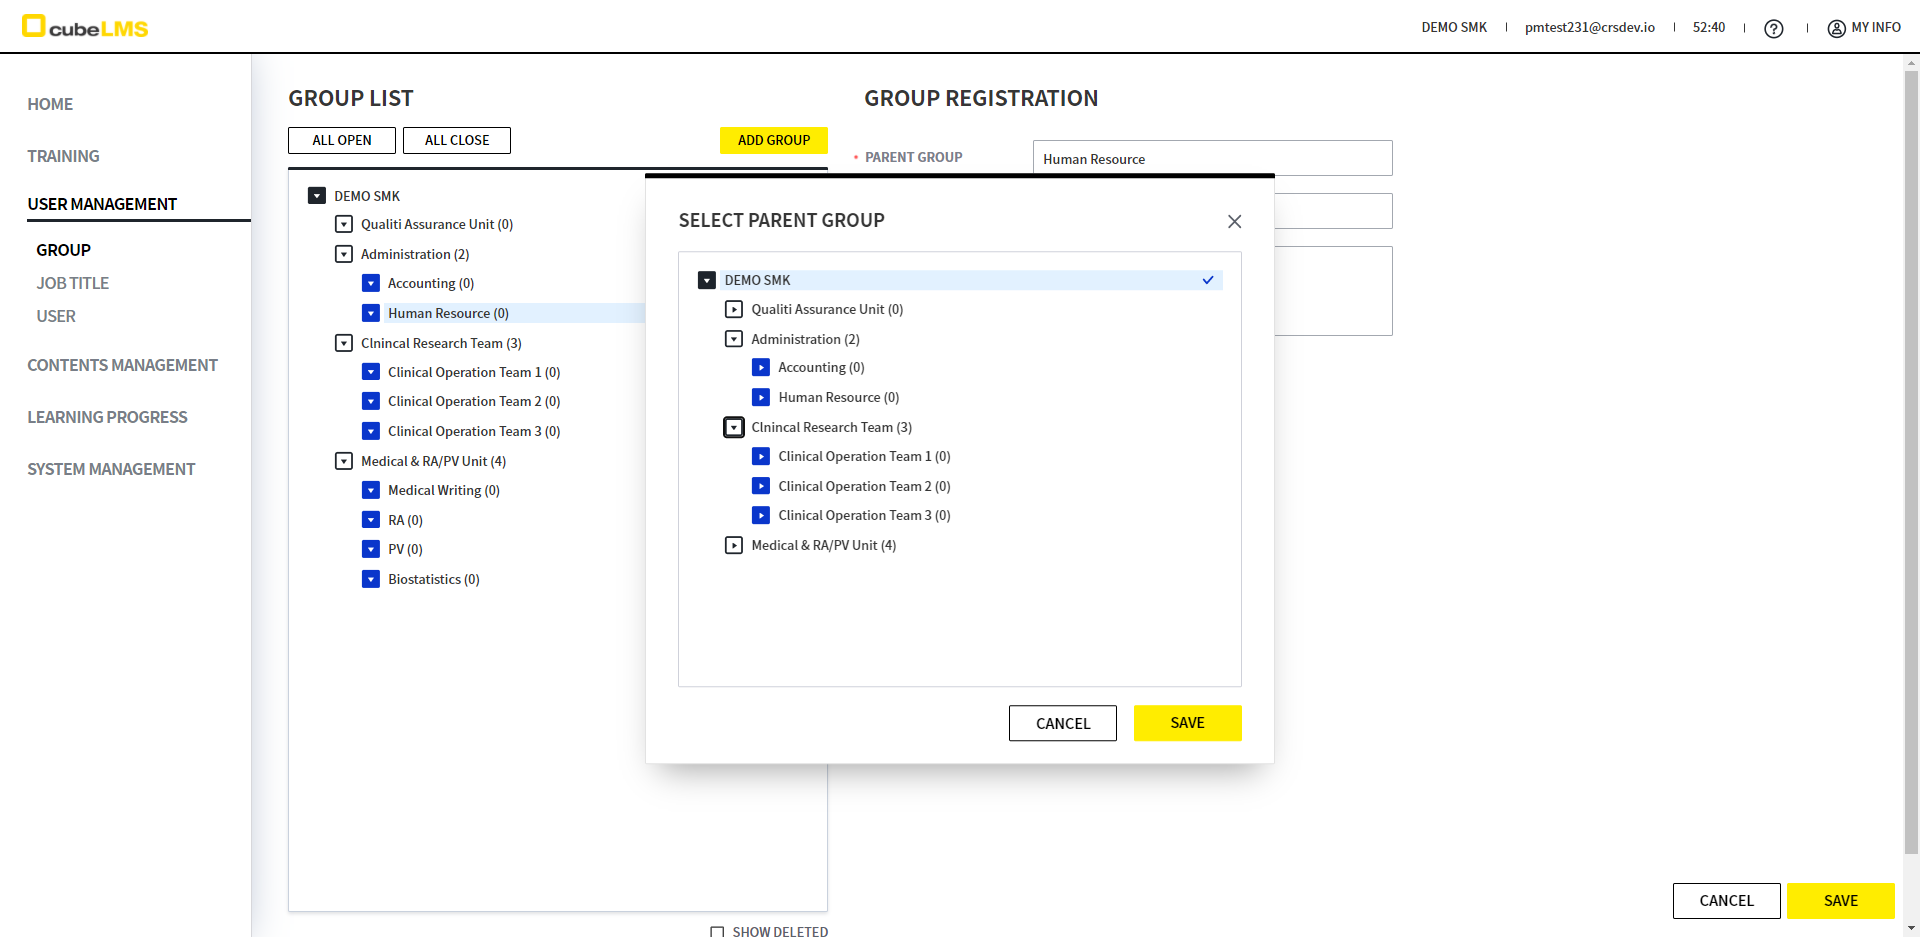
ADD GROUP
1. Add Group: Clicking it opens a screen on the right where you can enter Group information.
2. '*' is a required field.
3. Parent Group: Select the upper-level Group for the Group you are creating. If there is no upper-level Group, select the company name.
-
When selected, the Group hierarchy is displayed so you can select it directly.
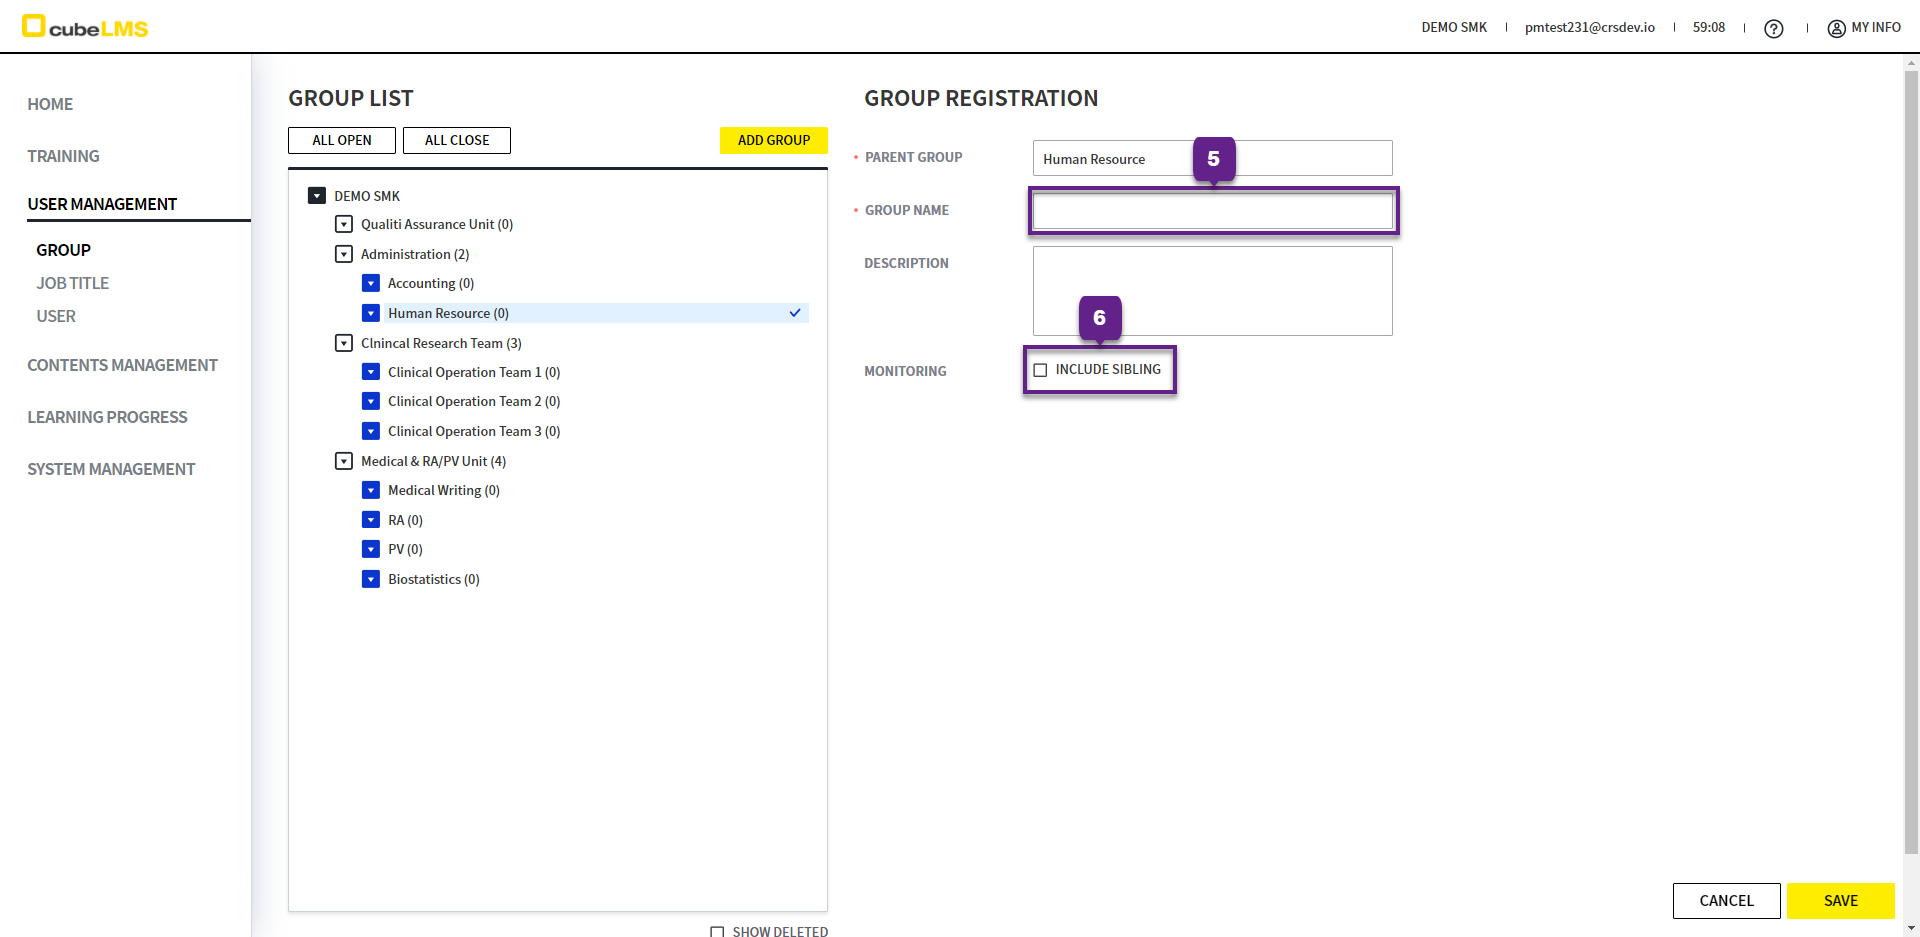
-
Enter the name of the Group to be created (Group Name).
Group Name cannot be the same as the parent Group.
6. By default, Group Manager can view the Training Progress of its members. (See LEARNING PROGRESS_USER )
-
Include Sibling:The Group Manager can also view the Training Progress of other Group members at the same Level. -
It is linked to the Manager function in the USER menu, so please configure it together.
-
The Management function can be found in USER MANAGEMENT_USER .
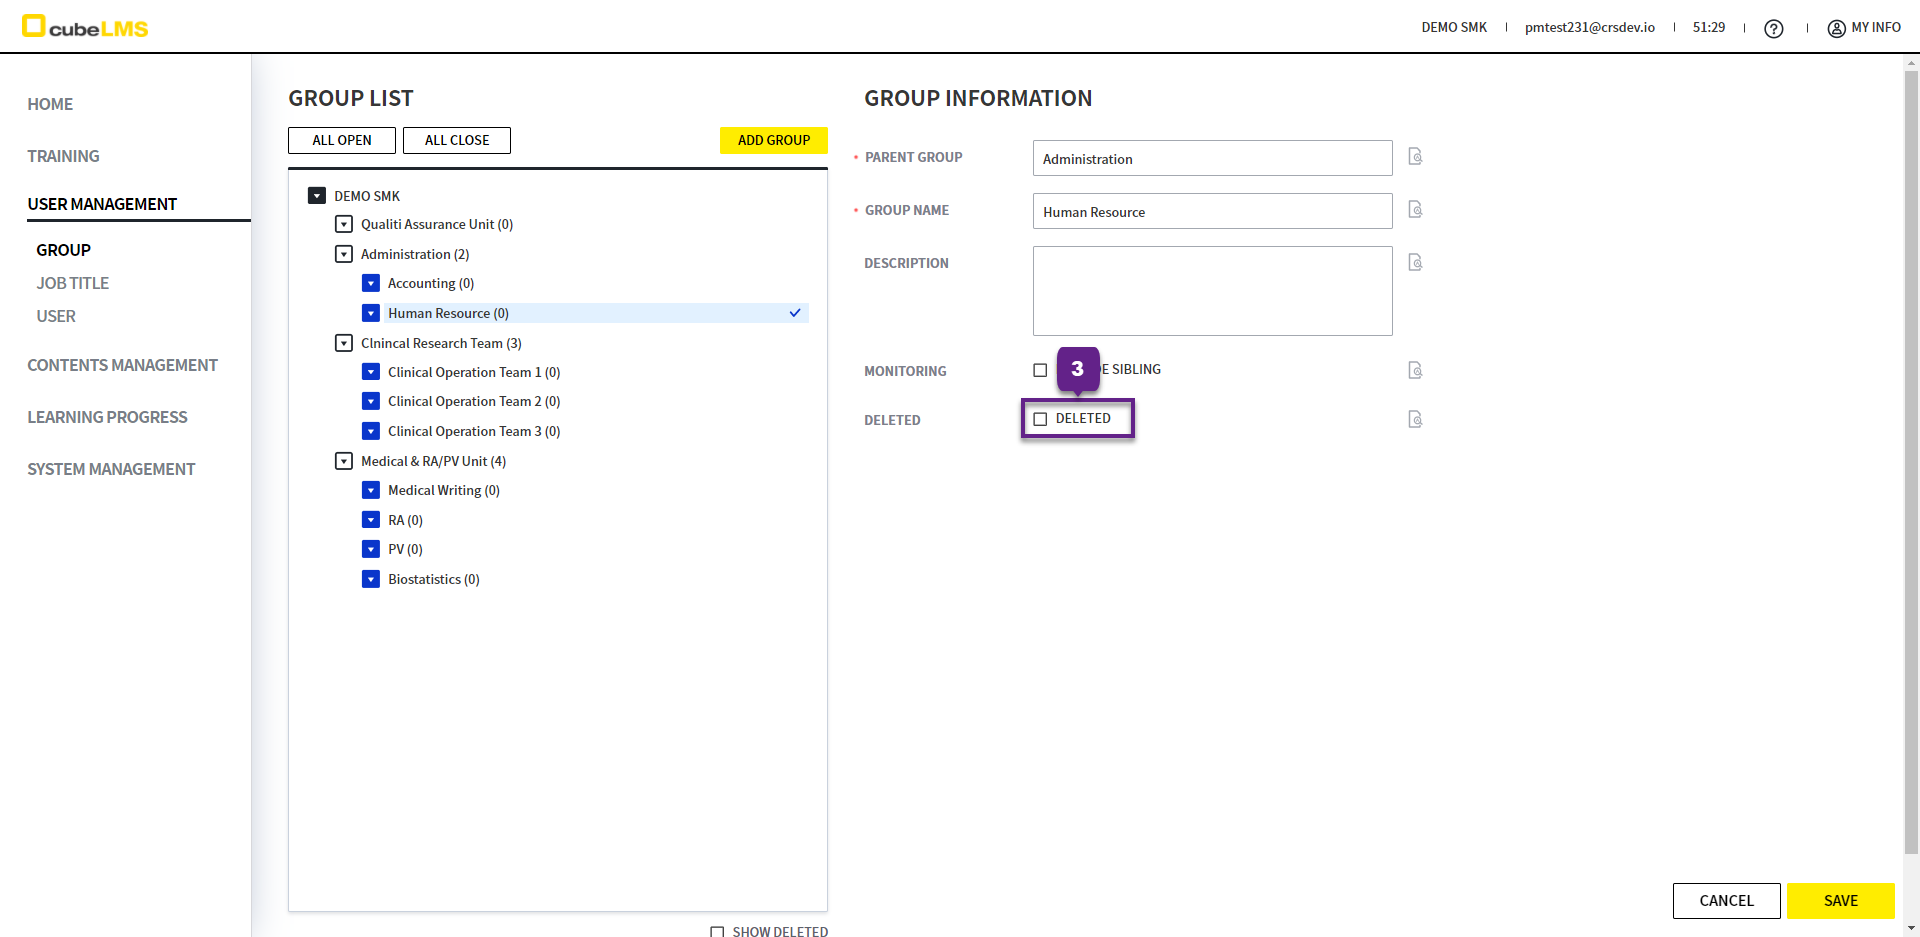
EDIT GROUP
1. Click the Group you want to edit.
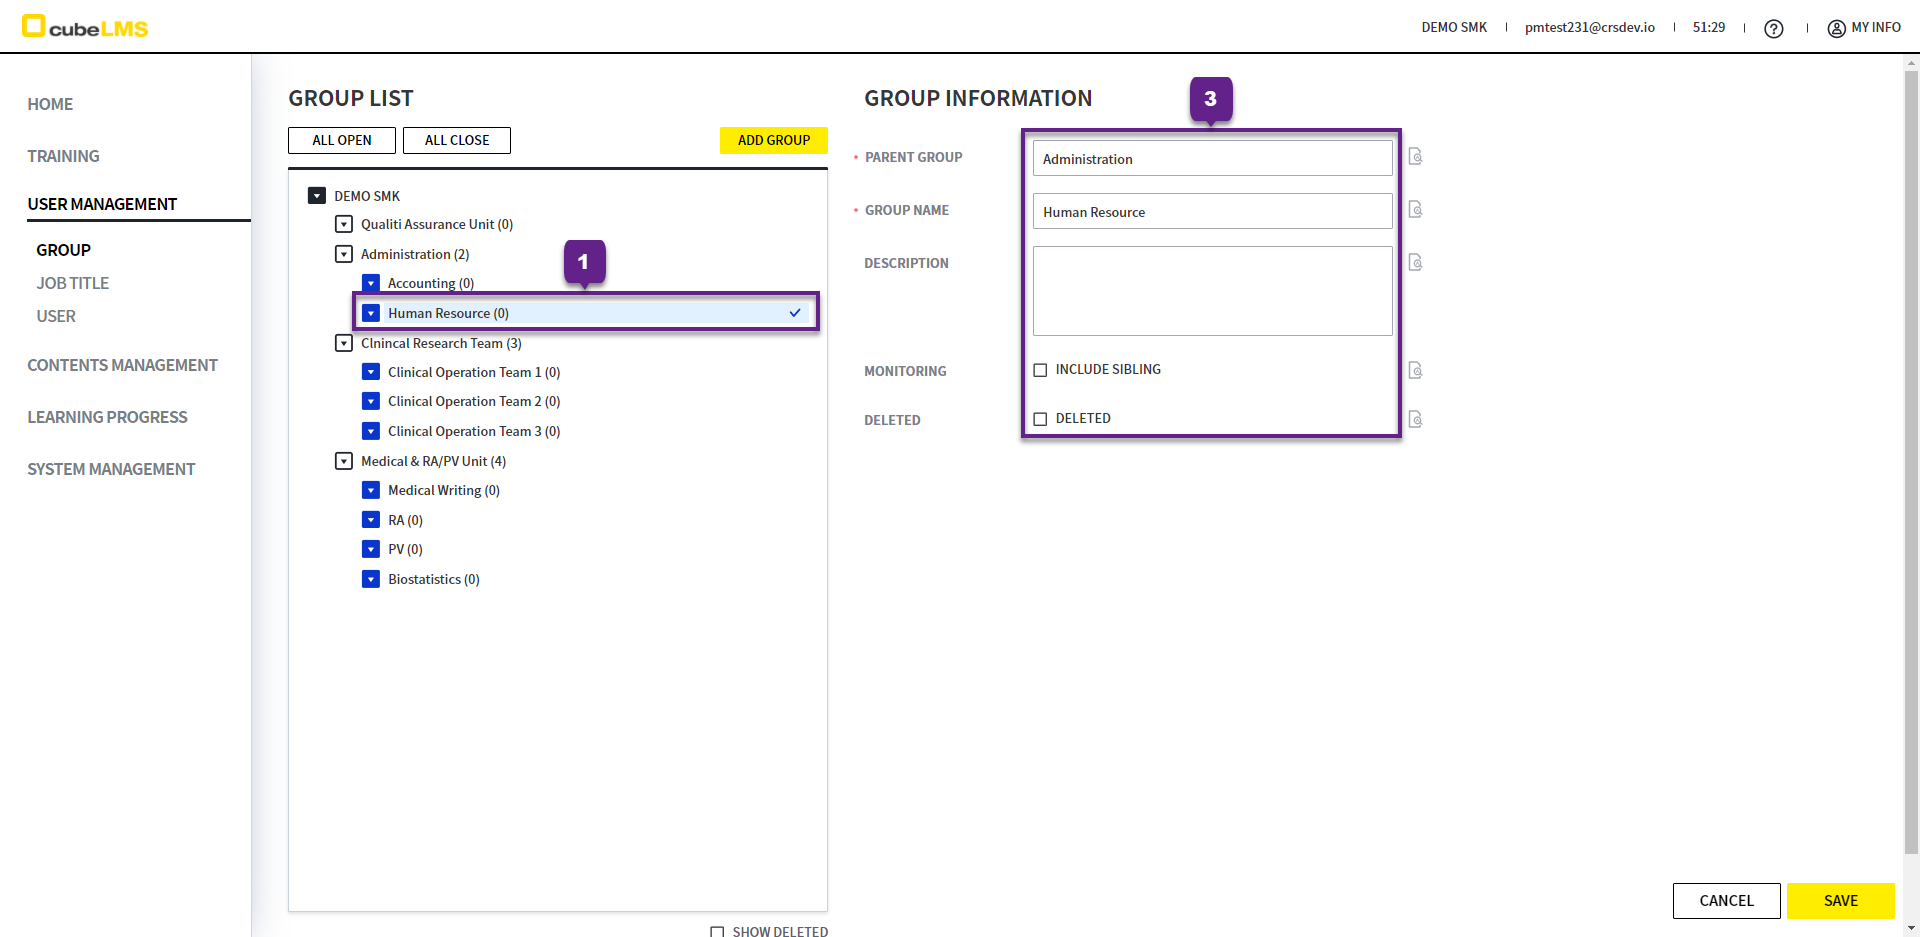
2. Deleted check: You can delete the Group.
However, you cannot delete the Group or its sub-Groups if they contain Users in Active status